Garden Project #1 – Fixing the Front Garden
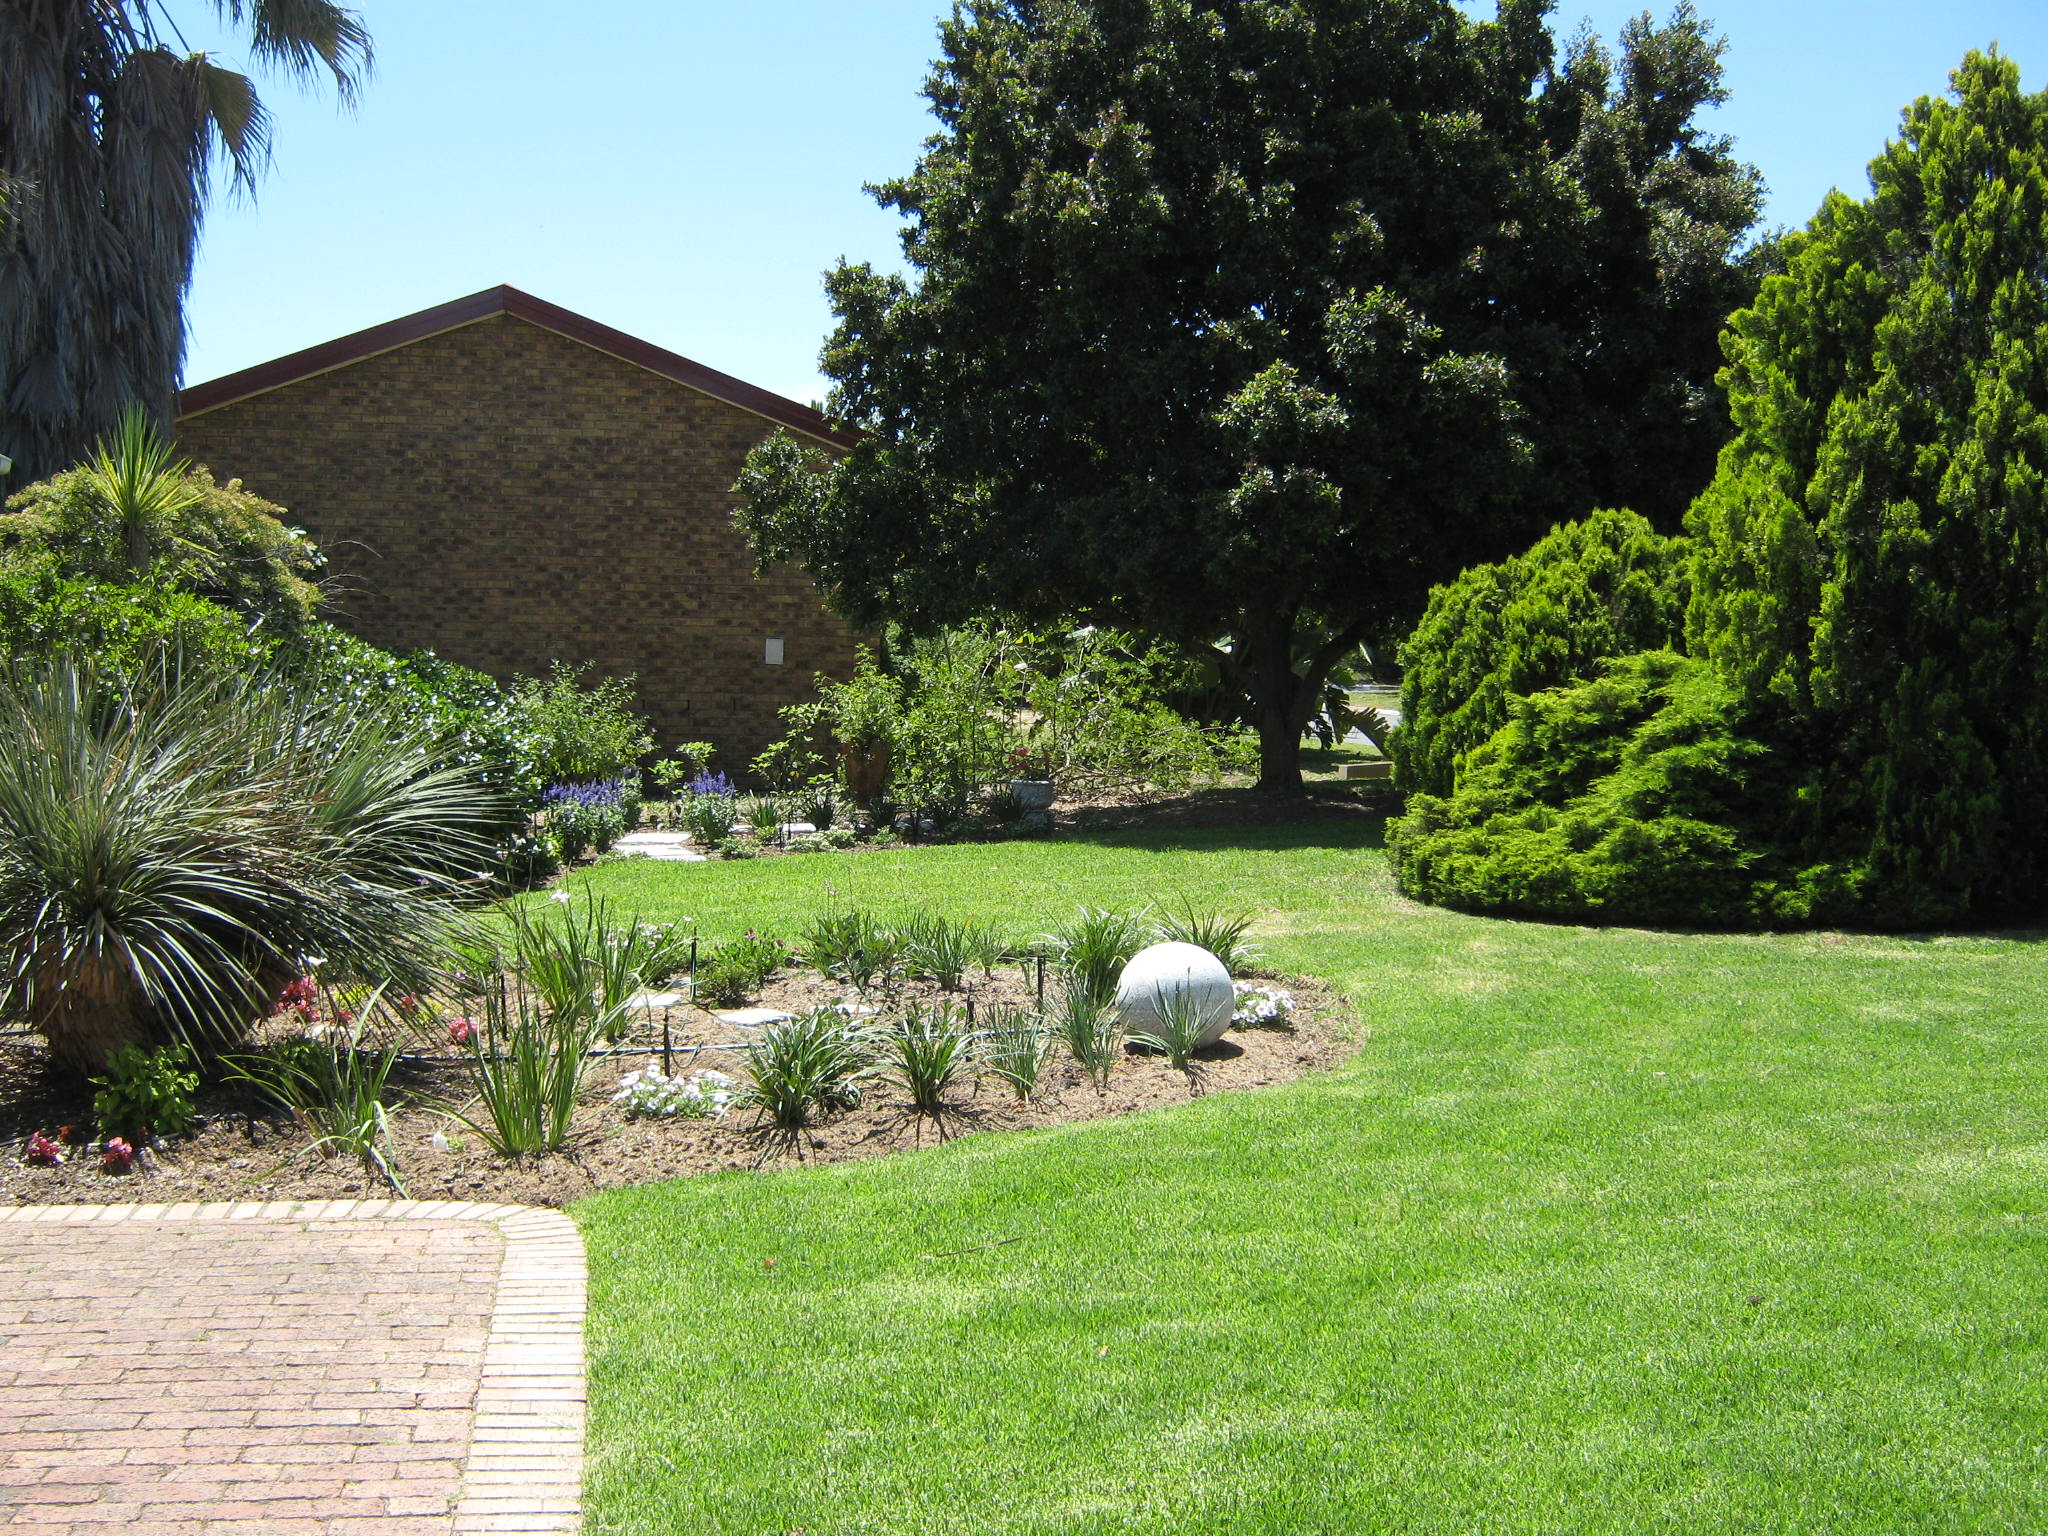
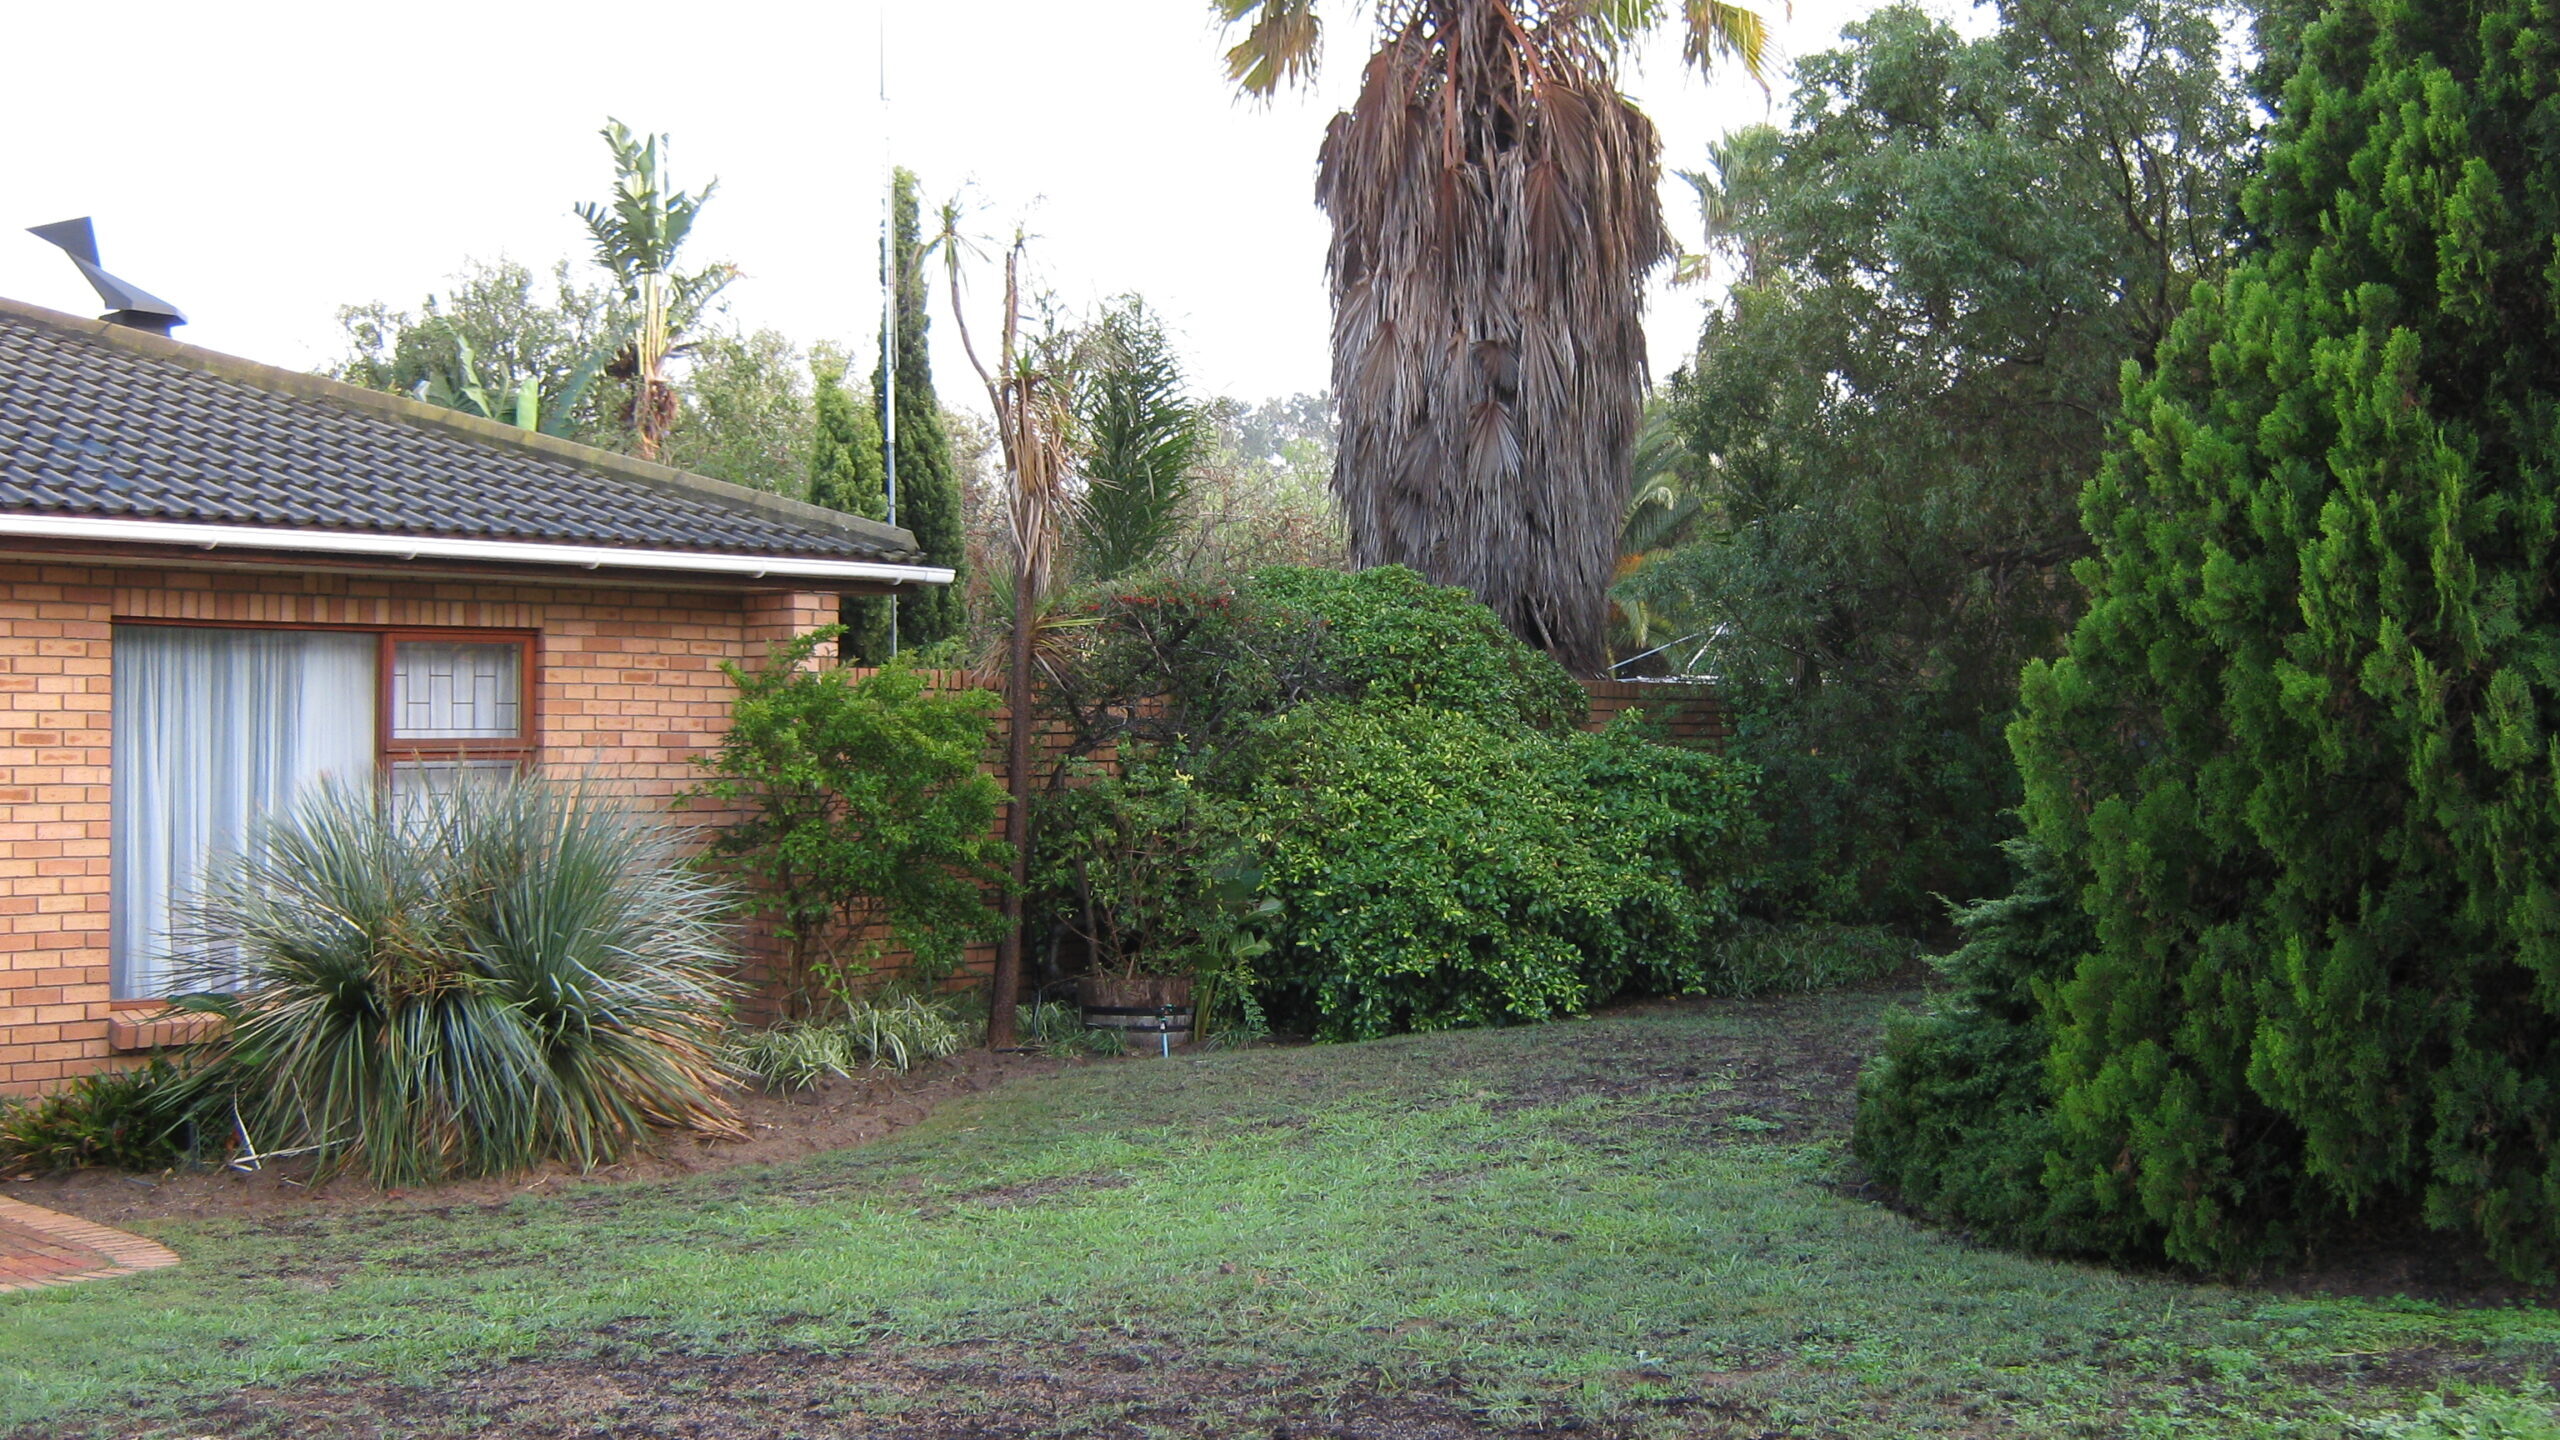
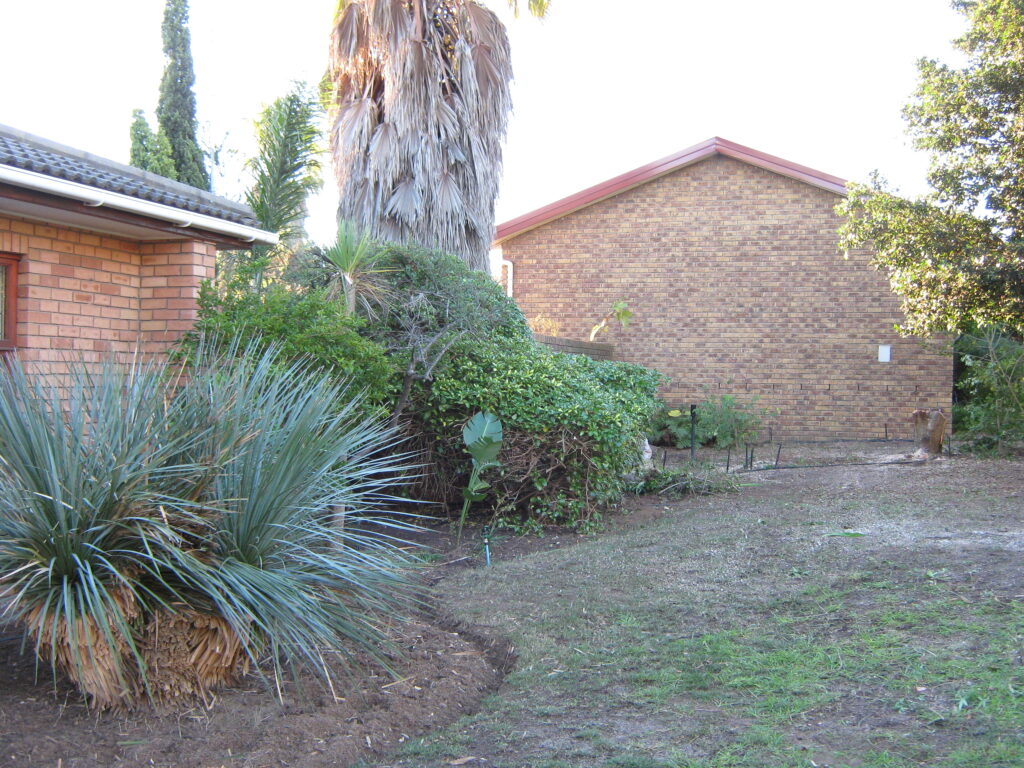
As you can see from the photos below the front garden was in rather a miserable state and in desperate need of some TLC. There was too much shade at the one end and not enough flowering plants. The lawn – if it could still be called that after a lack of water and excess of weeds – looked dismal. A rather depressing sight which I was determined to tackle and change and so the fixing of the front garden project began.
The first step
The first step was to draw up a plan of the garden and of the changes I wanted to make. The front flower bed needed to be extended in order to have more space for flowers and flowering shrubs. In that way I could also decrease the lawn area. I also wanted to have a flower bed with some shrubs separating our garden from the neighbour’s.
In drawing up the new design for the garden I had to take the size of the plants into consideration. It is very tempting to place the new plants very close together to avoid having gaps in your new layout but remember they do grow. So spacing them correctly is important.
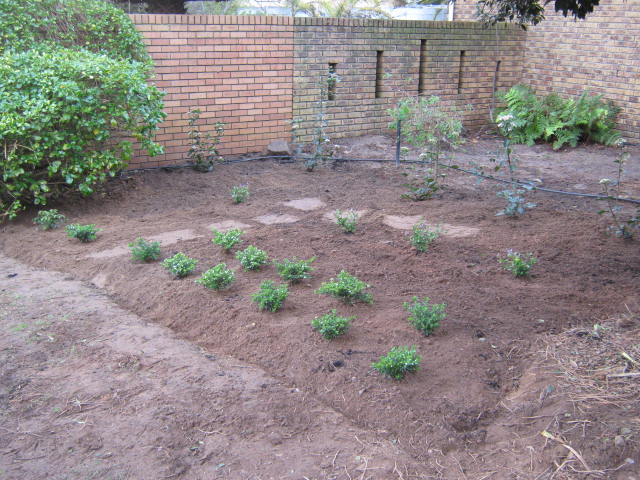
Another point to note is the layout of an irrigation system if you are going to use one. The one I used had those little sprayers that directed the spray at various degrees. In other words using a 180 degree spray would mean only the plants in front of it were watered and not the wall behind for example. Grouping the plants according to their watering requirements is also a great idea.
So once we’d settled on a design that both hubby and I were happy with the digging could begin.
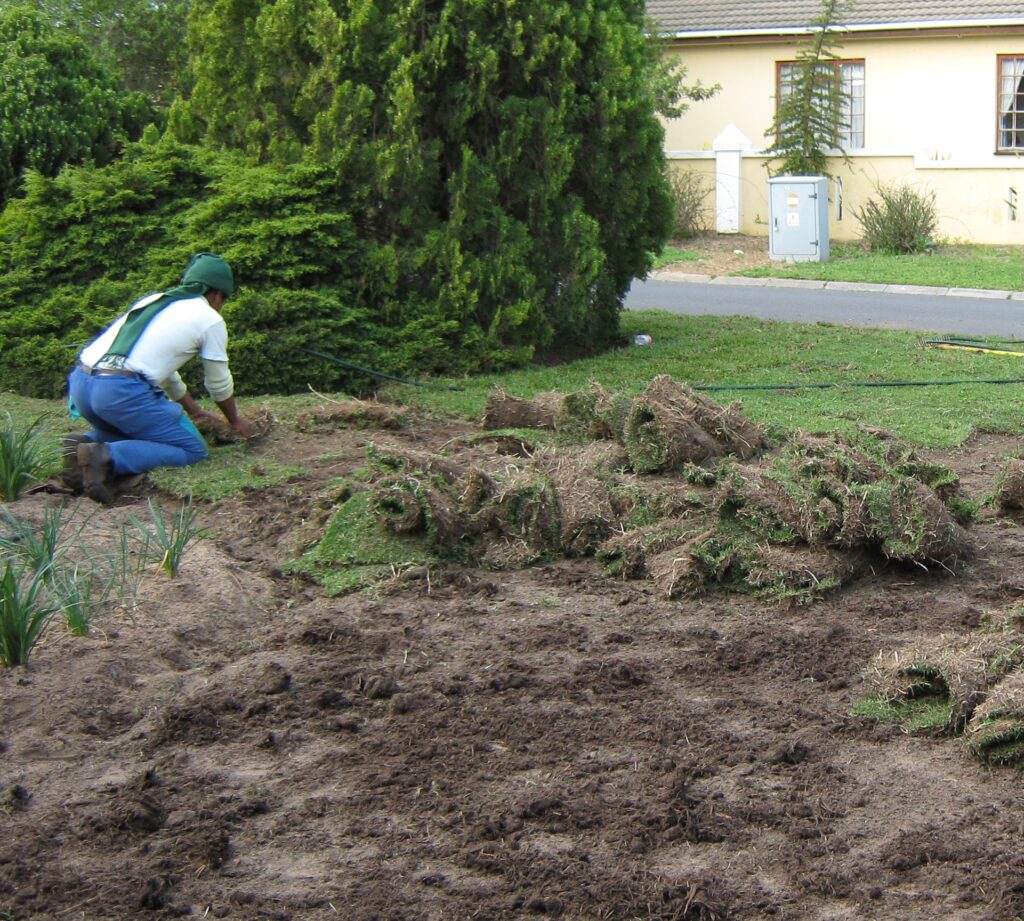
Getting underway
Since this was my project, it was mainly me doing all the digging. I must admit though, that I did get some help if there was a very stubborn tree root that needed removing. The spade was handed back to me very quickly though, and said help quickly disappeared back into the house.
I quickly became a firm friend of a few Cape wagtails that were keeping a keen eye on me hoping for me to toss them a grub or two. I kept them pretty well fed that winter since there were so many that I unearthed during my excavations.
The soil was very poor. It was mostly sand with some clay in the area of the Eugenia tree. This meant loads of compost had to be added to the soil so the plants would have some nourishment to grow. I’m a firm believer in the benefits of bone meal so each new plant received a good dose to help them develop a strong root system.
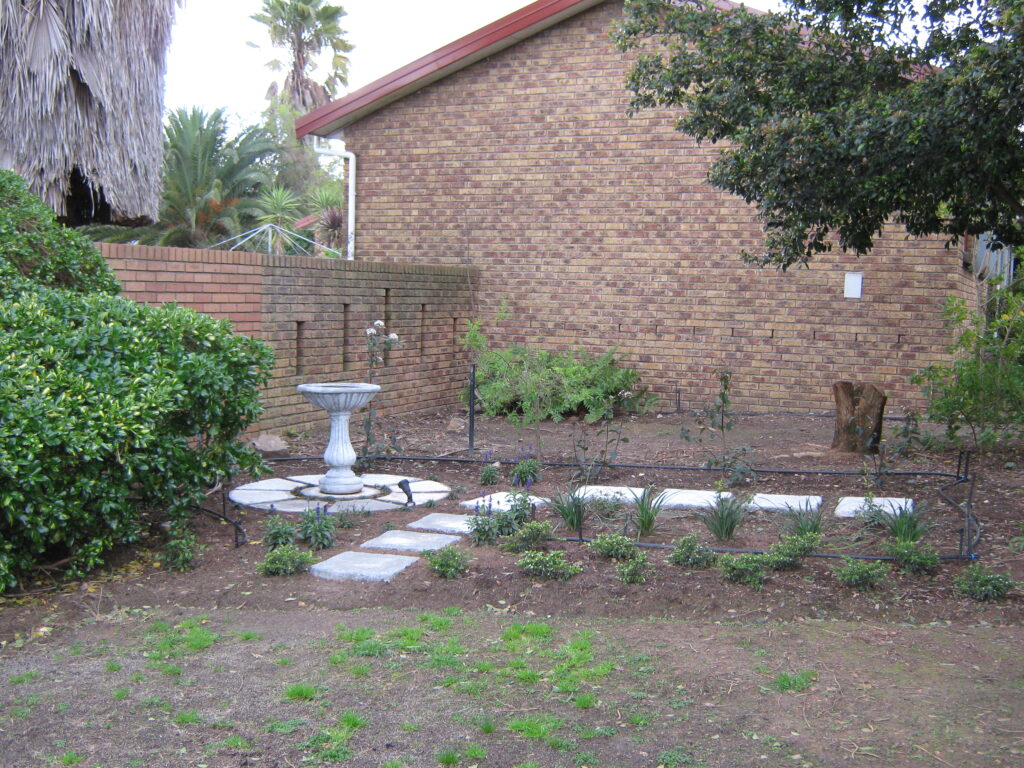
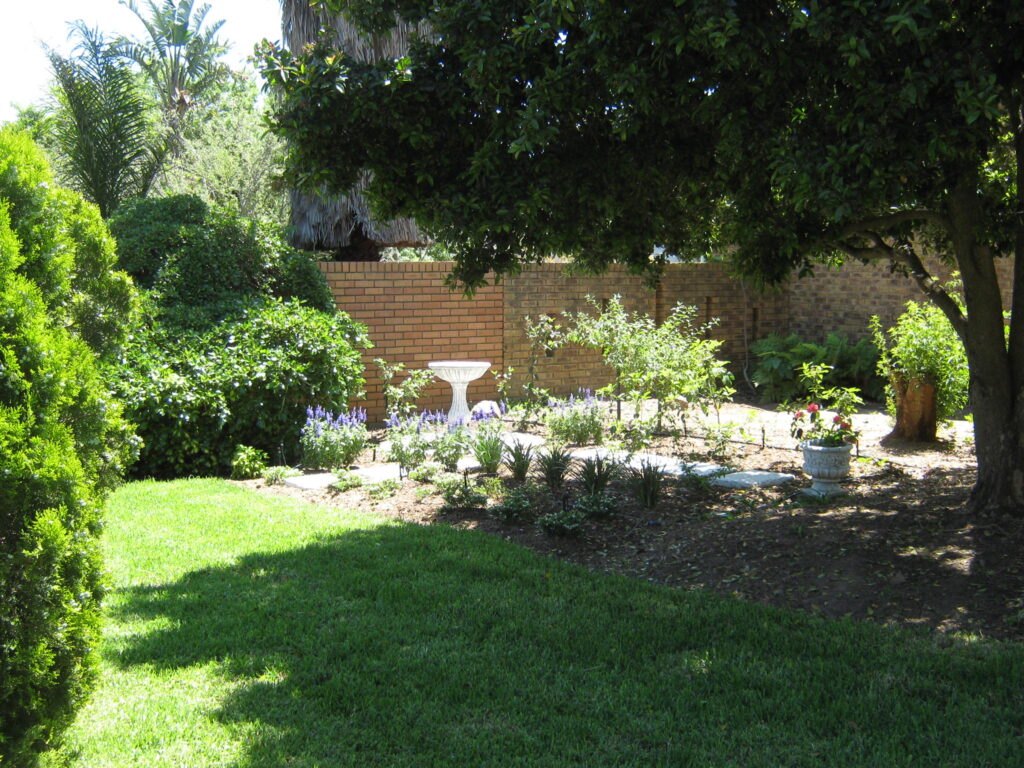
My design included some hard landscaping just to add a bit of interest. Pavers lead one in between the plants and a birdbath added a focal point. Hubby must get credit for laying out all the irrigation as well as rigging up the light to illuminate the birdbath at night.
Plant selection
The idea on this side of the garden was to select white and blue flowering specimens and to step the plants. In other words starting with the tallest at the back I planted Viburnum tinus ‘Lucidum’ to create a hedge and backdrop to the Plumbago auriculata. The Viburnum’s leaves are a dark green which make the blue Plumbago flowers stand out. The Plumbago is a fast grower and can get quite scraggy so I usually give it a good pruning after it has finished flowering. I have since discovered that it sends out suckers and therefore can spread in between other plants which can be a real pain to keep pulling out. On the plus side it is quite drought tolerant and does attract butterflies and bees to the garden.
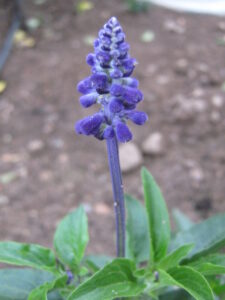
I used Liriope ‘Evergreen Giant’ in the third level. I believe their common name is Lilyturf. They do have small blue flowers however their main attraction is the dark green strappy leaves. The front two rows are planted with Cuphea hyssopifolia also known as a stardust bush. Keeping my colour scheme in mind I selected the white flowering variety. A few Salvia farinaceas were added in for good measure for their lovely blue colour.
Tackling the lawn
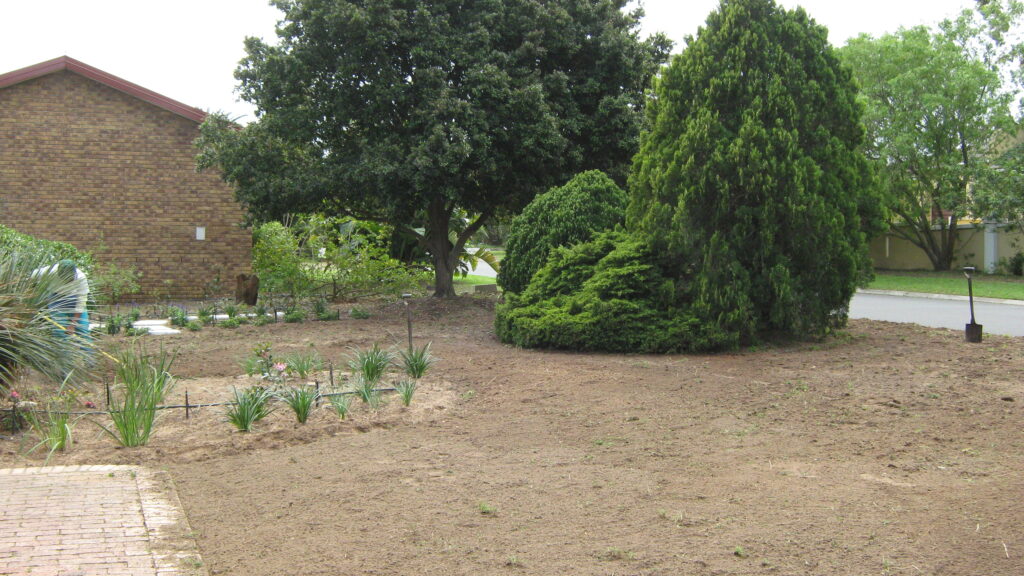
The next big step was tackling the lawn. This basically meant ripping it all out and planting anew. The dilemma is that half the area received quite a lot of sun all year round and the other half was mostly shaded. The Kikuyu grass we had survived better on the sunny side but did not like the shade, especially not during the cold winter months.
We had already removed a tree to allow more sunshine to that half of the lawn but it was still predominantly shady in winter. The solution was to have two types of grass. I selected LM Berea because of its tolerance for shade for the one half and Kikuyu for the other half of the lawn. There is a slight colour difference between the two although it was not so noticeable by the time the two grass types merged a bit.

The front flower bed
Once the lawn was down and starting to take root I added a few finishing touches to the front flower bed.
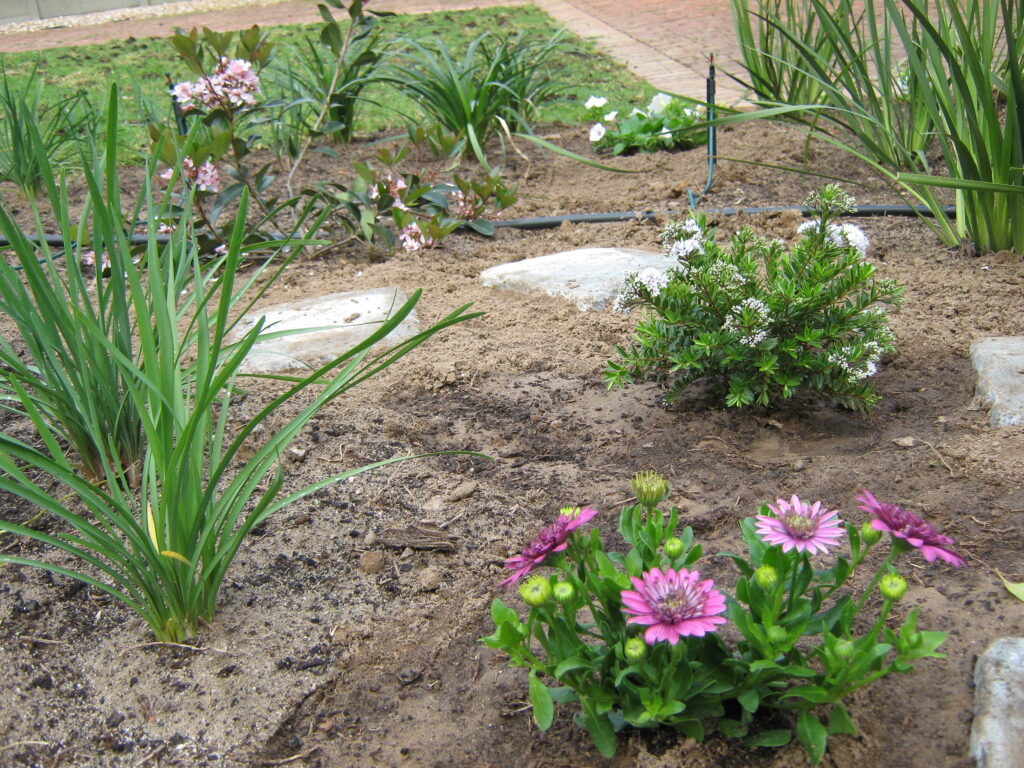
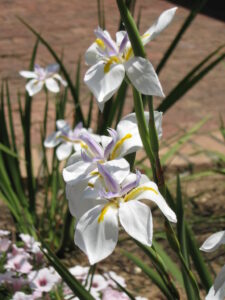
The original bed included a rather large spiky ball which is a type of Dasylirion as far as I can tell. I didn’t fancy a fight with its spiny leaves so I left it as a focal plant. I needed some other plants with long slender leaves create a theme. Dietes grandiflora was a great choice not only for its foliage but also because it has pretty delicate white flowers. The blooms are on long slender stems which gives them the appearance of floating in the air. Quite a lovely sight when a host of them flower at once.
I focused mainly on pink, white and mauve flowers in this new section of the bed. The Rhaphiolepis indica or Indian hawthorn was given the centre spot. This shrub is one of my favourites because it is covered in a profusion of pink blossoms in spring. A real magnet for bees.
A white Hebe diosmifolia and some pink and white African daisies (Osteospermum) were added to the mix. A popular choice for many gardens is wild garlic (Tulbaghia violacea). I selected them for their pretty mauve flowers and because they are quite a hardy plants. Their slender strappy leaves tied in nicely with those of the Dietes and Liriopes.
A job well done
After six months I could finally say the project was complete. I was very happy with the result and hubby liked it too. More importantly he was very happy that I was happy. Seemingly the plants also thought it was a job well done because they grew and grew and before long I was called in to do some pruning.
A gardener’s job is never done….

4 thoughts on “Garden Project #1 – Fixing the Front Garden”
Love the transformation of your garden. Thanks for sharing the useful steps. You make it look so easy.
Thanks Charon, it’s my pleasure.
The change looks great.
A plan is definitely a must. We have a plan and plant as we acquire plants, so it stays “empty” for a while. As you say spacing is important, ours looks very open at the moment because here the trees and shrubs take a couple years to establish before even thinking about growing 😋. Also our growing season is only 6 – 8 months.
Love your notes, keep it up.
Thanks Marietjie, it is amazing to see how the garden has filled out over time. Keep us updated on how your project is taking shape.
Comments are closed.