Making DIY arts and crafts for the garden is a very trendy hobby. One of the popular mediums to use is cement. It is durable and pretty easy to work with and can be moulded into such a variety of shapes. I love the rustic look of cement objects.
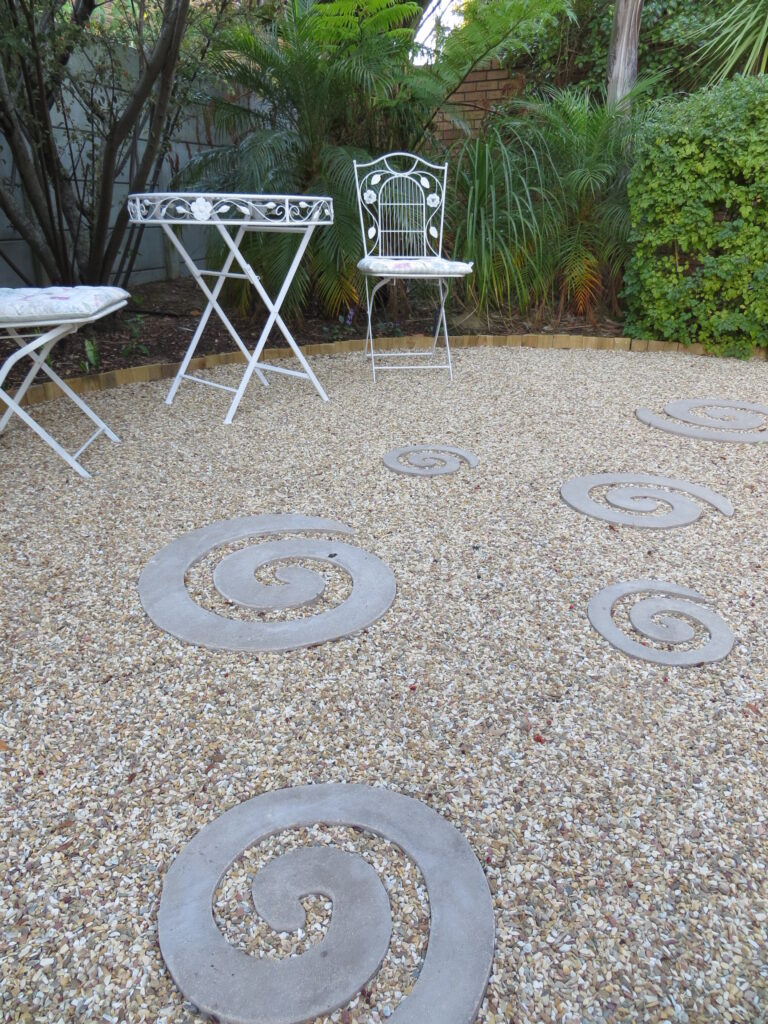
The decorative cement spirals featured in last week’s blog about creating a contemplative garden are from a DIY project in a gardening magazine. You can use these to add a personal touch to your garden.
This project was a team effort. I was in charge of design and procurement and hubby was responsible for the handy man stuff like the hammering of nails and cement mixing.
Why select a spiral?
Spirals are all around us. Nature is full of them. If you look closely you are bound to find quite a few in your own garden. Snail shells, ferns fronds unfolding and the unfurling of a rose bud. The patterns created by the seeds of a sun flower are spiral and even a spider spins his web in a spiral.

The spiral is one of the oldest and most universal symbols. It represents the cosmic force, a doorway to life, the cycles of time and nature, spiritual journey, evolution/learning/growing, emanation, winding and unwinding, birth and death, the dynamic aspect of things.
~Susun Weed
It was such a coincidence that a DIY article on making cement spirals was featured in The Gardener magazine around the time I was busy planning my contemplative garden. The project looked easy enough to do and so I decided these would be perfect to use in my garden design.
The supplies needed for this project are easily sourced at a general hardware store. I’ve listed the what you’ll require below.
What you will need
- 600 x 600 mm Shutter board per spiral
- Fine river sand
- Cement
- 50 mm galvanised metal strips (approx 5 m per 50 cm diameter spiral)
- 75 mm wire nails
- Lubricant spray eg Q20
Additional tools
- Pencil and paper
- Tin snips
- Hammer
- Pliers
- Cement trowel
- Nitrile gloves for working with cement

The design
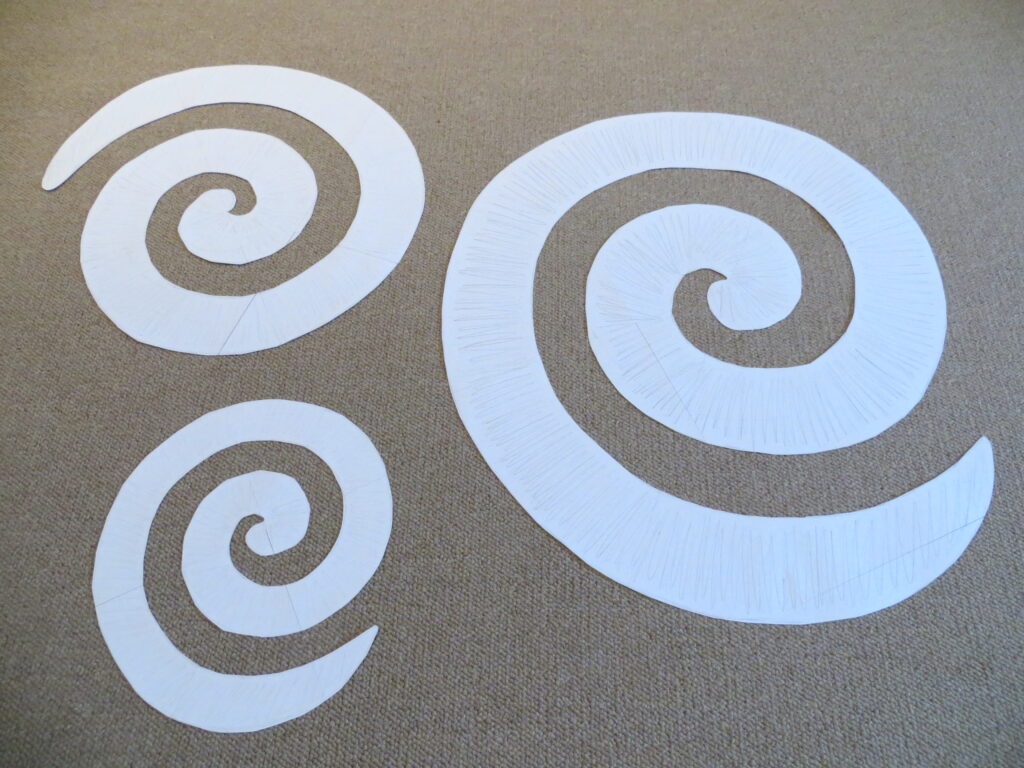
I only had A4 size paper on which to draw my spiral design so ended up sticking a number of sheets together to create a large enough page for the 58 cm diameter (Ø) spiral design. An A1 page would probably be ideal if you happen to have one otherwise just stick the pages together as this worked quite well.
I also made a template for a 43 cm Ø and a 28 cm Ø spiral. The trick is to remember that your spiral needs to be ‘loose’. In other words it should have a space between the curves and not be a solid pattern.
The spirals can be any size you prefer. Just keep the size of your shutter board in mind since the templates need to fit on the board with at least a one to two centimetre space available to the edge.
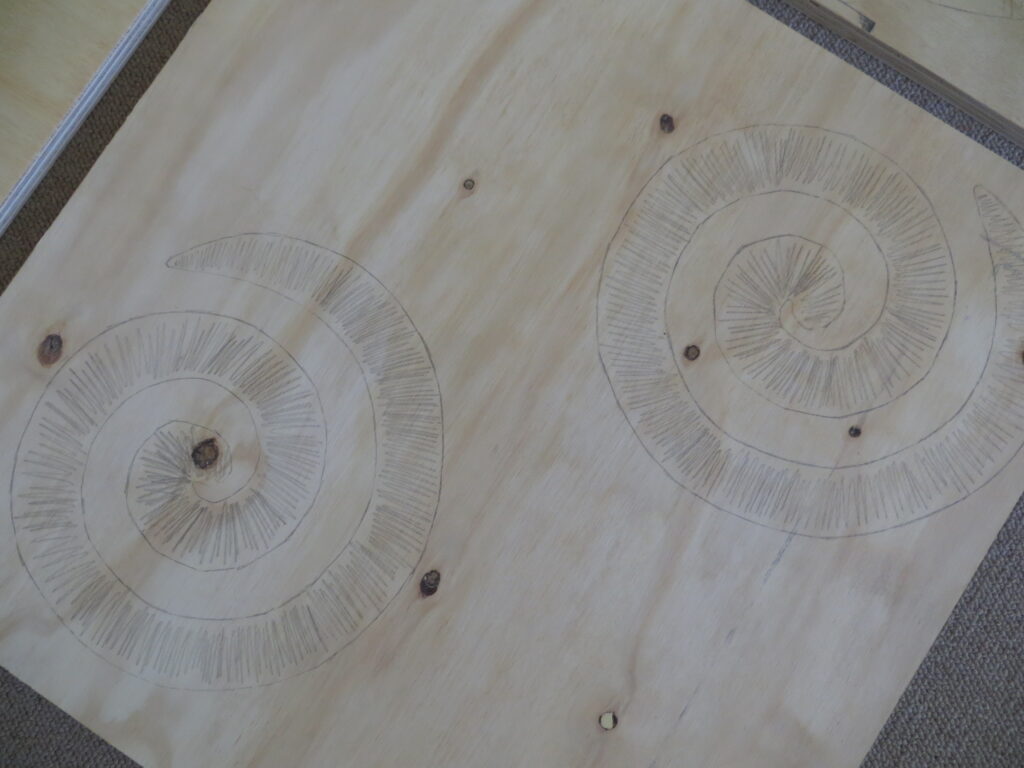
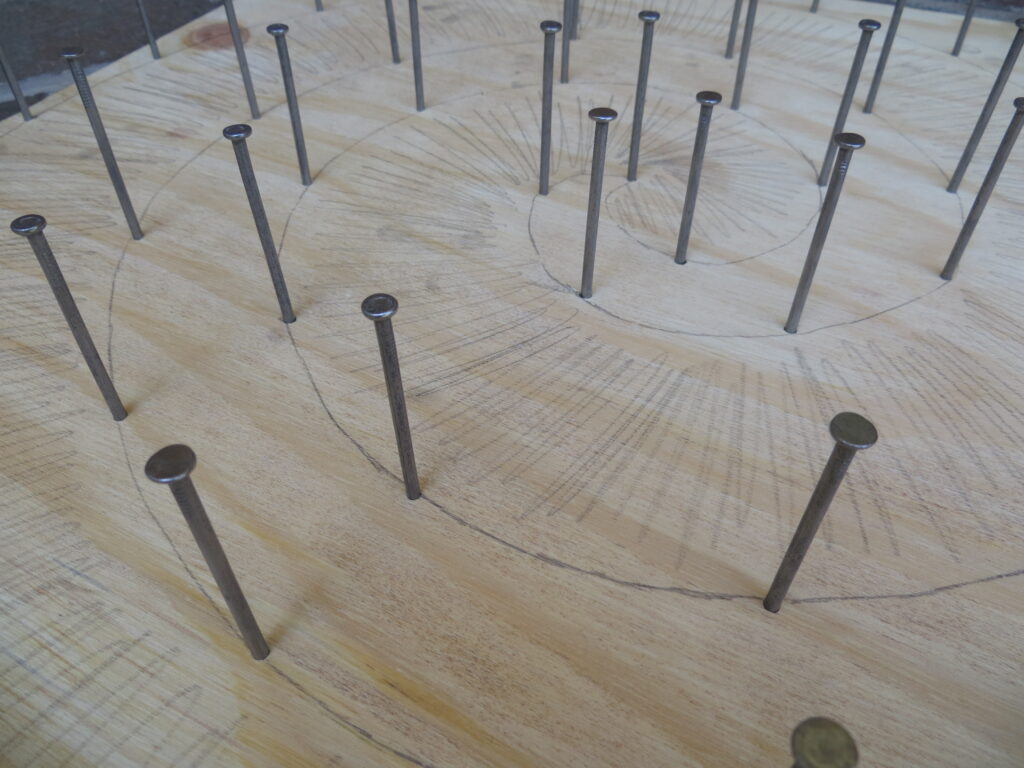
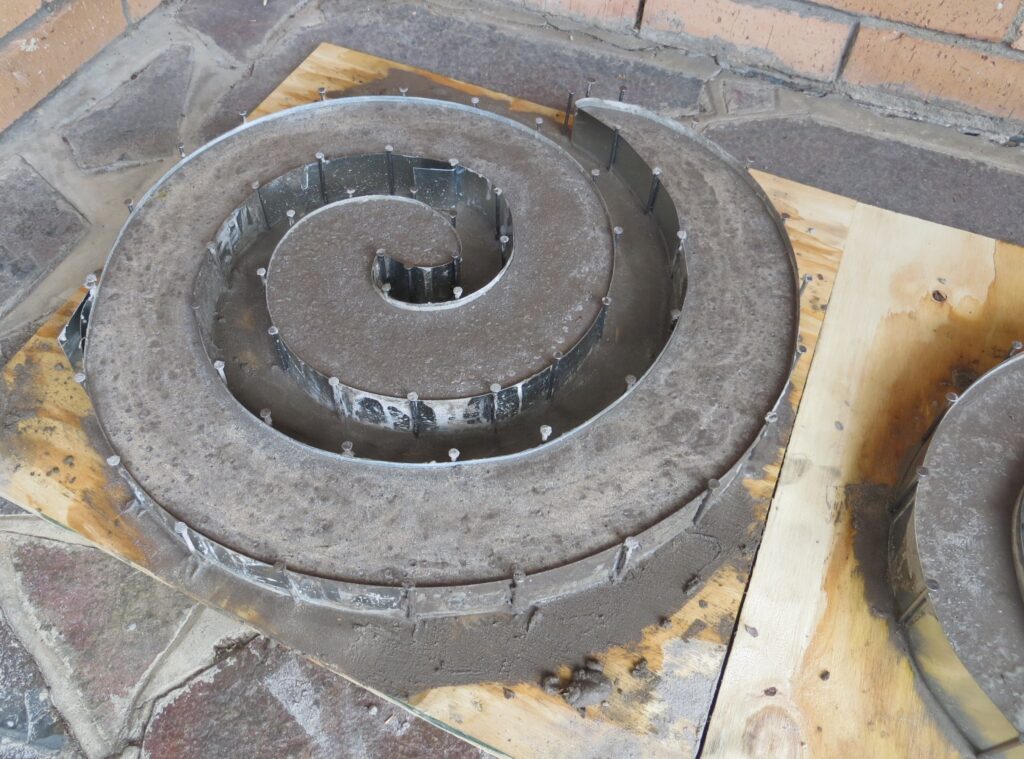
Transfer the spiral design onto the shutter board by tracing around the edges. I found that it was a good idea to shade the area that would eventually be covered by the cement. This will help in guiding you through the next steps of making the cement spirals.
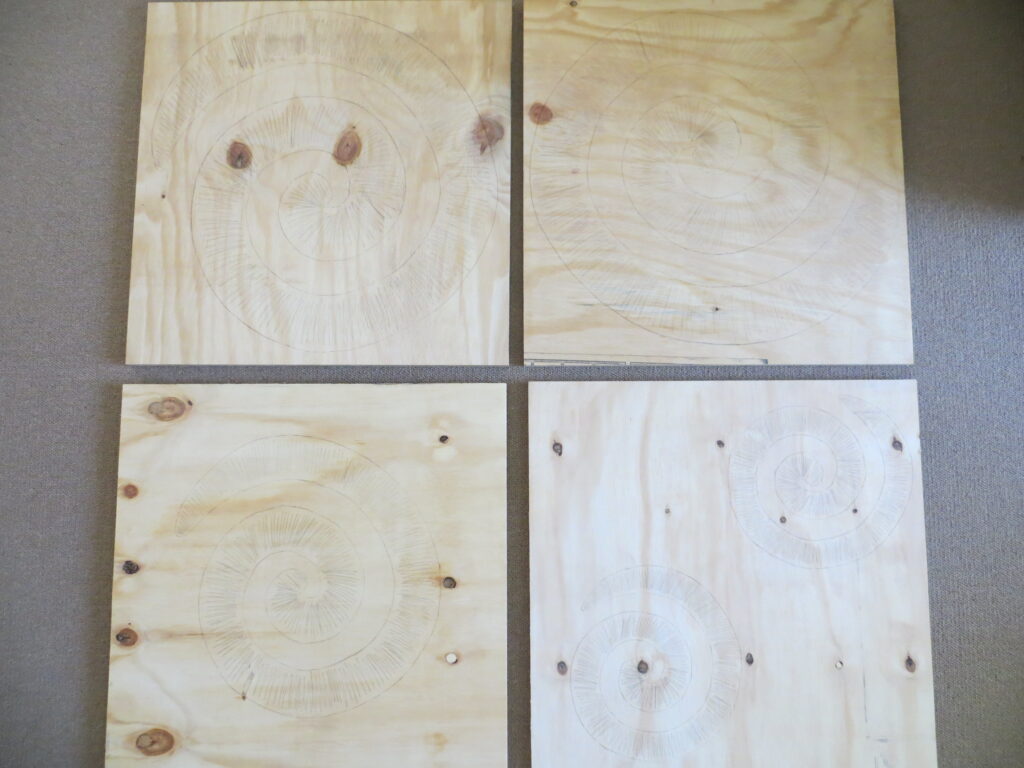
I managed to fit two of the smaller spirals onto one of the shutter board squares.
The construction
I gladly handed the next step over to hubby. This is where precision in hammering is required and I don’t have any of that.
Very few know that I earned the nick name of ‘Log Lasher Nat’ on a ski holiday a good number of years ago. We were meant to knock nails into a log in under a minute in an Après Ski activity. Well, needless to say, I hit more log than nails and the ones I did hit were bent skew or knocked out completely!
So thanks to hubby the wood nails were all up straight and evenly spaced following the edges of the spiral design.
Wearing a good pair of gloves while handling the metal strips is recommended since the edges are quite sharp. I used my gardening gloves with a flexible latex grip.
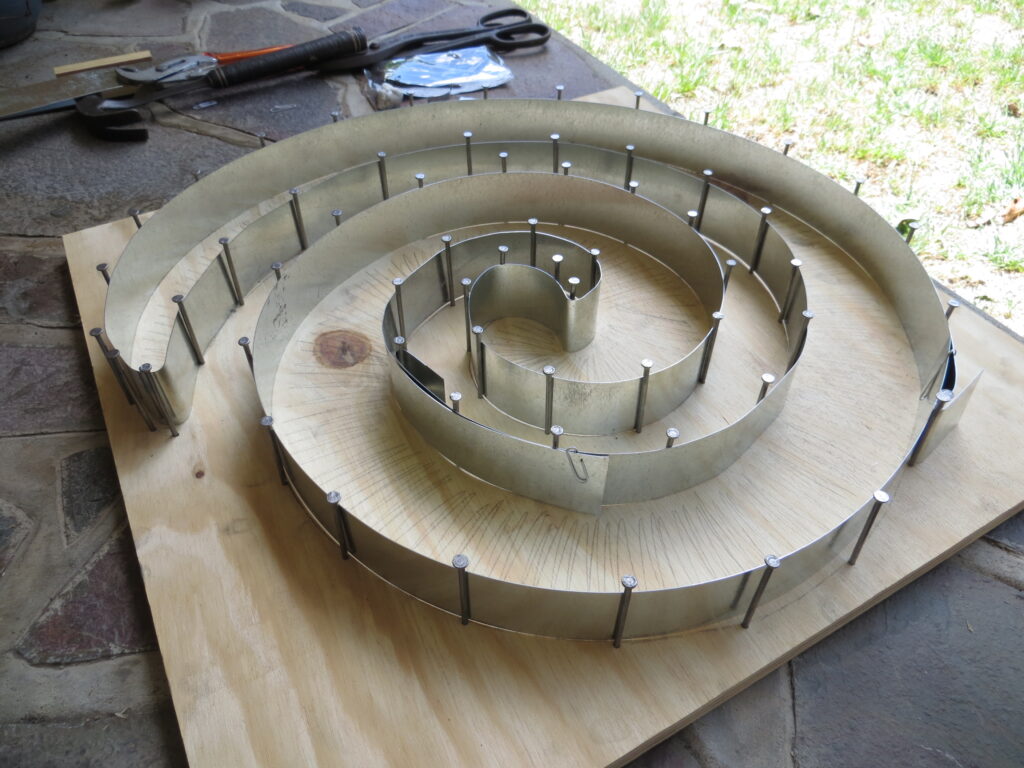
It was impossible to work with the full five metres of galvanised metal strip in one go so we cut it into manageable pieces. Starting at the outside point of the spiral, fold the metal strip in half and carefully bend the metal shaping it to the curve of the spiral.
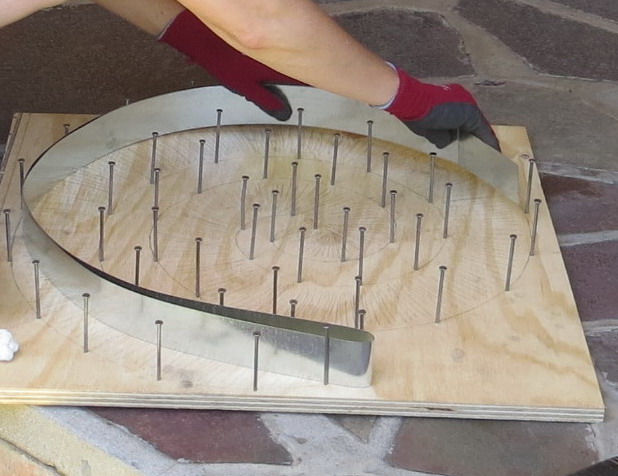
The galvanised ribbon has a tension to it once shaped and will tend to press outward. We used the joins to secure it to a nail which helped keep it in place. Remember to keep the nails on the outside of the metal strip. In other words the smooth metal strip must run along the shaded area of your spiral design drawn on the shutter board.
We sprayed the moulds with a lubricant to ensure the they would release once the cement had dried so as to not ruin the spirals. A bit like oiling a jelly mould really.
Time to mix the cement
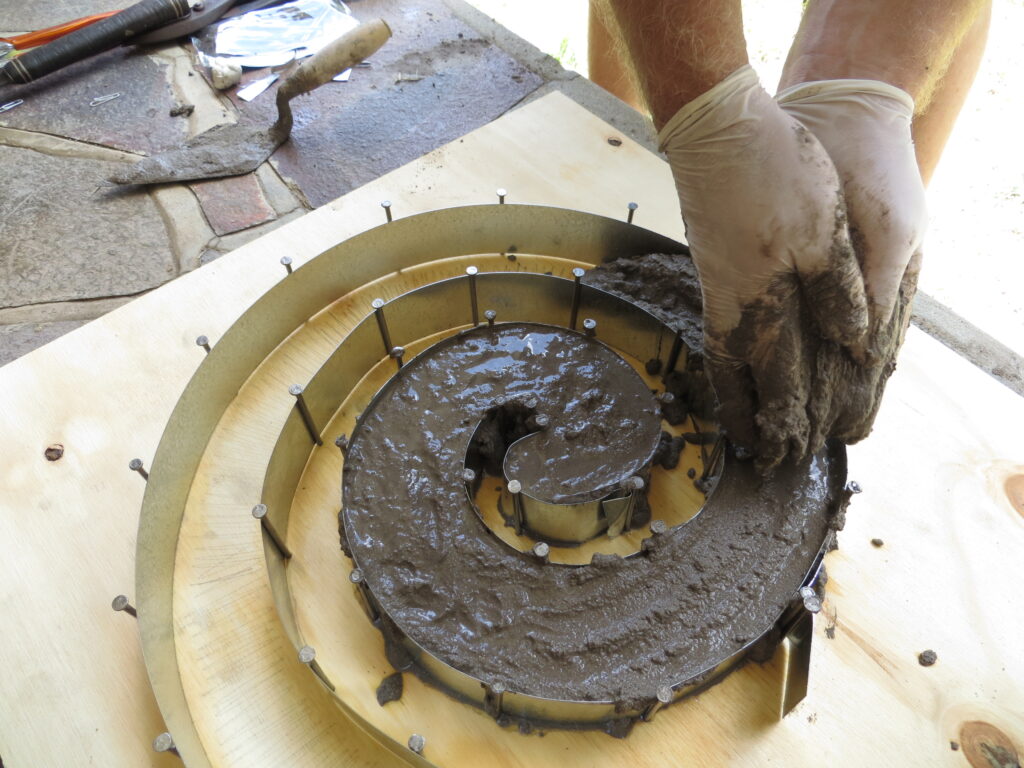
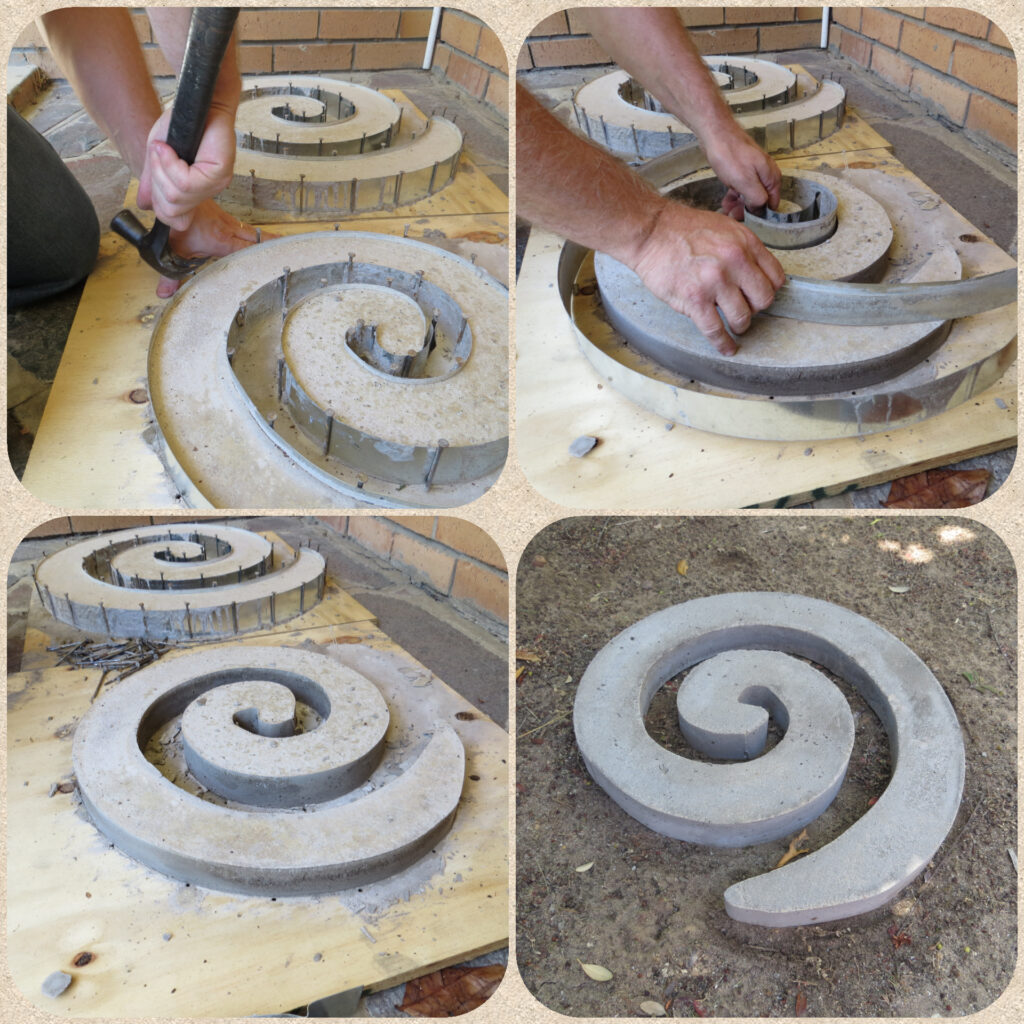
The recipe said to mix 3 parts river sand with 1 part cement and enough water to make a mixture with the consistency of a thick yogurt. Scoop the cement mixture into the mould filling the shaded area of the spiral. Cement can really burn one’s hands, so it is advisable to wear gloves to do this.
Knock the board lightly to agitate the cement slightly. This is to release any air bubbles that may be trapped.
The cement needs to cure for at least seven days. It is preferable to leave the moulds in the shade and not let them dry out too quickly. I sprayed water on them each day to aid the curing process.
After about a week the cement spirals should be dry and can be removed from their moulds. Remove the nails and carefully release the metal strips. As the spirals lie on the shutter board they are actually upside down so turn them over before placing them in the garden. Any rough pieces can be smoothed by sanding them with a very fine grade sand paper.
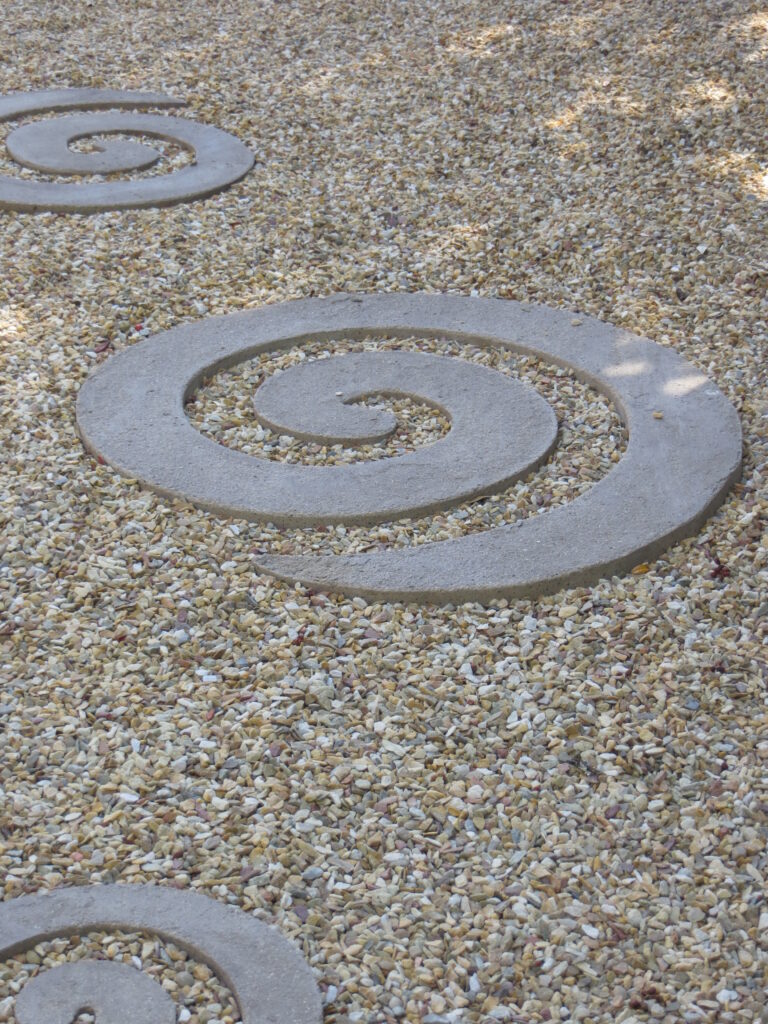
Once all the spirals have been released from their moulds they can be placed in the garden. I laid my cement spirals in small stone chips of about 6 mm in size but you can also get creative by filling them with plants. Small plants like mondo grass (Ophiopogon japonicus) or Chamomile can be used especially if the spirals are to be used as pavers as these plants tolerate light foot traffic.
I hope this gives you some inspiration to try creating some of your own garden art. I’d love to hear how your projects have turned out so please feel free to share your experience in the comments below.
Until next time, have fun being creative.
Wow, this is beautiful. So unique.