How to grow Butternuts
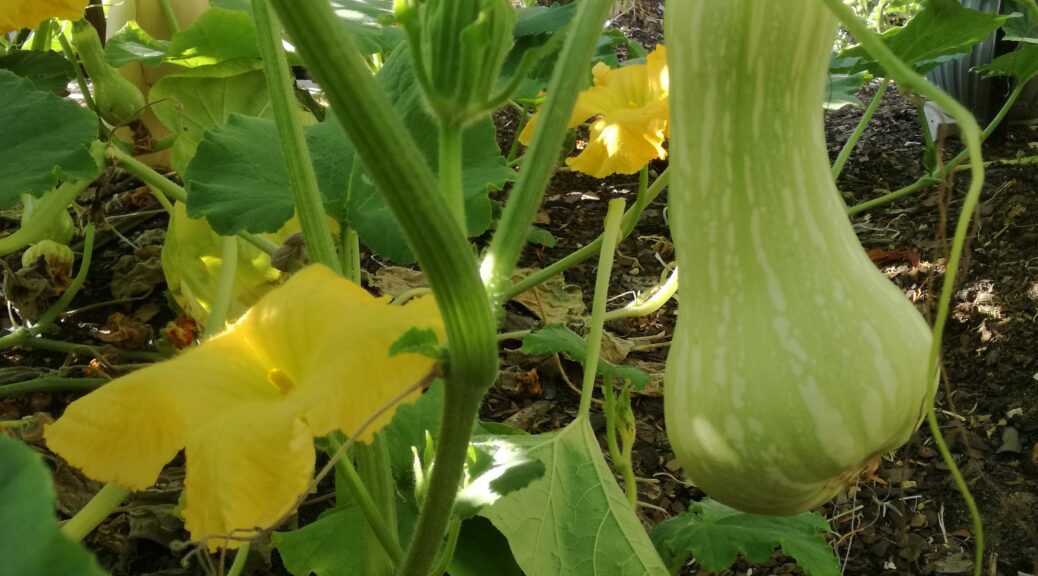
Whether you know them as butternut squash or butternut pumpkin, butternuts are an easy crop to grow. Even the most novice gardener could be confident to give them a try.
Interestingly this species of Cucurbita moschata is the result of cross breeding Hubbard squash and Gooseneck squash nearly ninety years ago. It gained popularity over the years and now this squash with its buttery orange flesh has become a firm favourite.
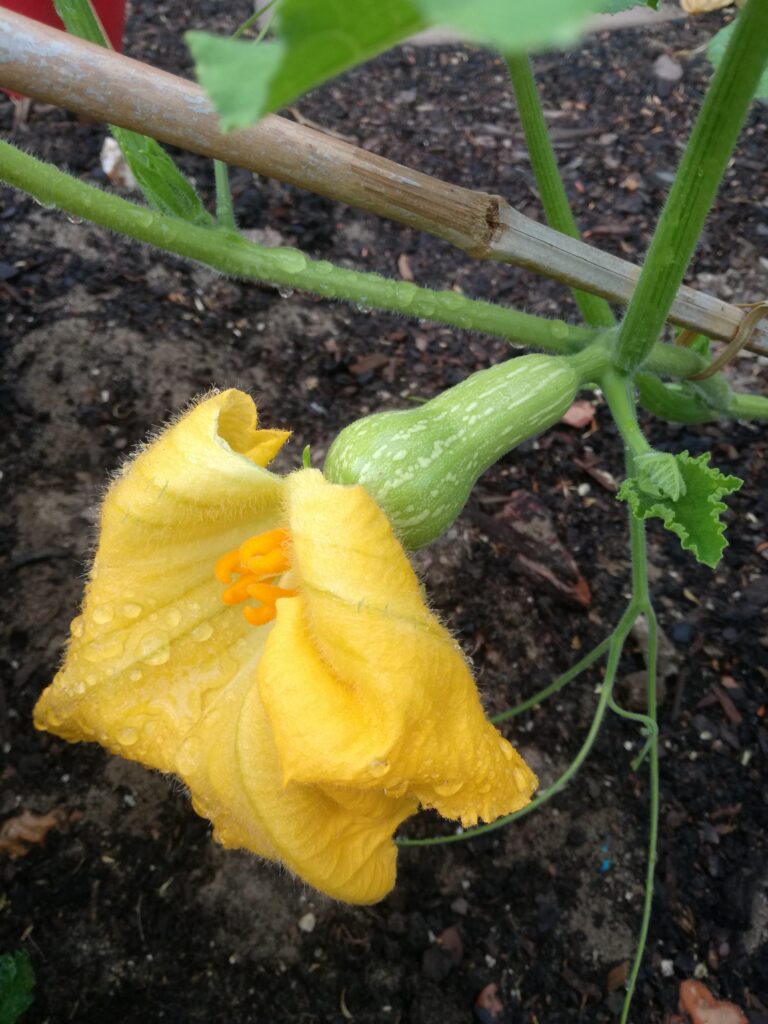
Butternuts are an example of winter squash. They are typically grown from the start of spring through summer. Yes, you read it correctly. By saying they are a warm season crop sounds like I am contradicting myself. So just to clarify winter squash are those that are grown to maturity on the vine. Their skins are usually toughened like that of butternut and pumpkin. They can be stored for many months and are normally cooked before being eaten.
Summer squash, on the other hand, still have a soft skins and seeds when harvested. They can be eaten raw and do not have a long shelf life like their cousins. Patty pans and zucchinis are examples of summer squash.
So how do you grow butternuts?
Select a sunny position that gets at least six to eight hours of sun per day. They are heavy feeders so they will need richly composted soil. Butternut seeds should be planted directly into the ground because the plants do not like their roots to be disturbed. I find it is a good idea to plant two seeds in each hole spaced about 50 cm apart. Once they have sprouted and grown a few centimetres high pinch out the weaker of the two seedlings.
Growing up
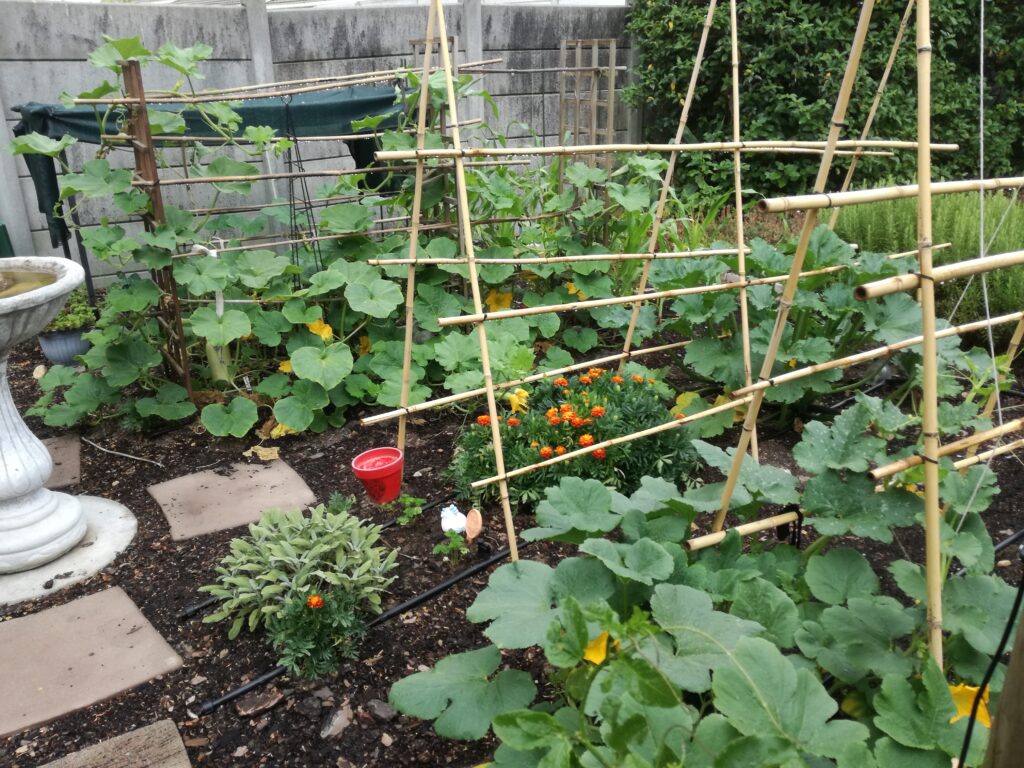
The vines can easily spread up to three meters which could be quite a challenge in a small veggie garden. The good news is that butternuts can be trellised. The vines have tendrils and will readily grab onto any structure you give them to grow on.
I used a trellis made of bamboo canes suspended between two wooden lattice frames and just secured the vines with plant ties. They soon wrapped their tendrils around the bamboo for extra support.
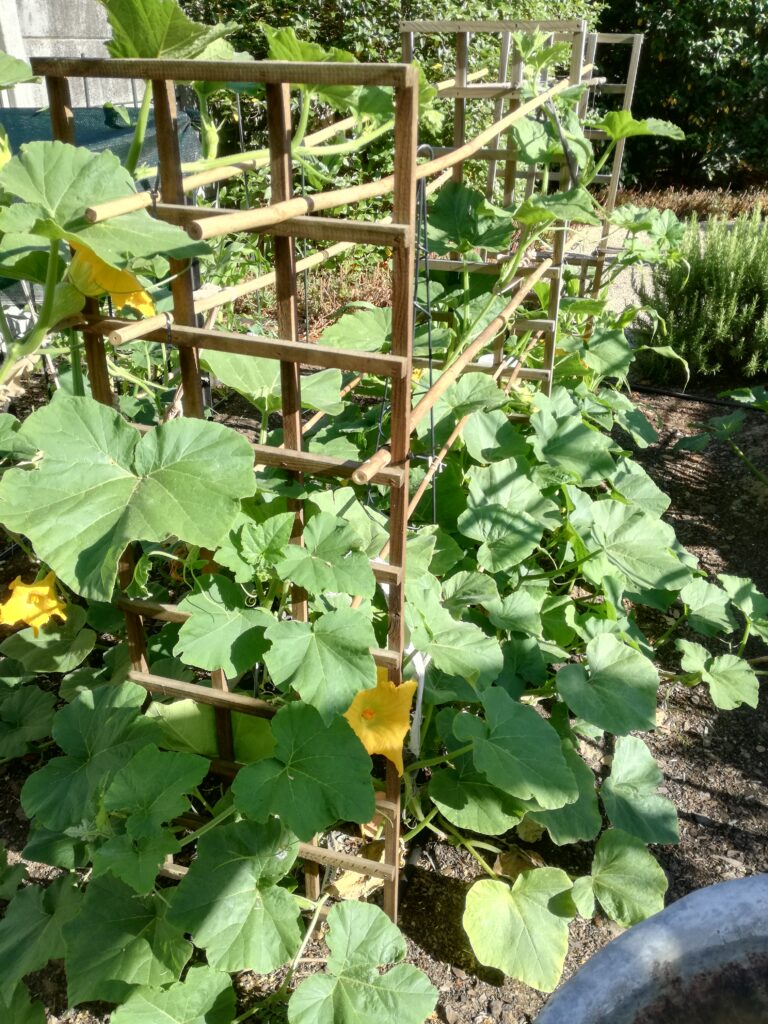
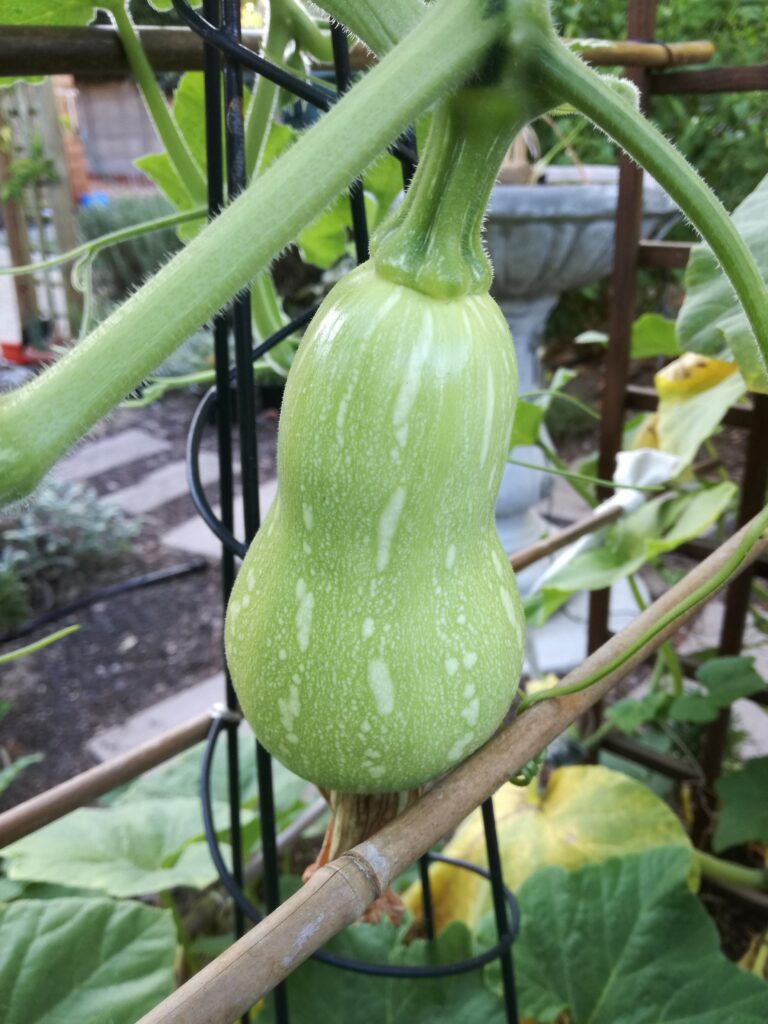
You need not worry that the fruit will be too heavy for the vine to support because the clever plant ensures the stem is strong enough to hold the developing fruit.
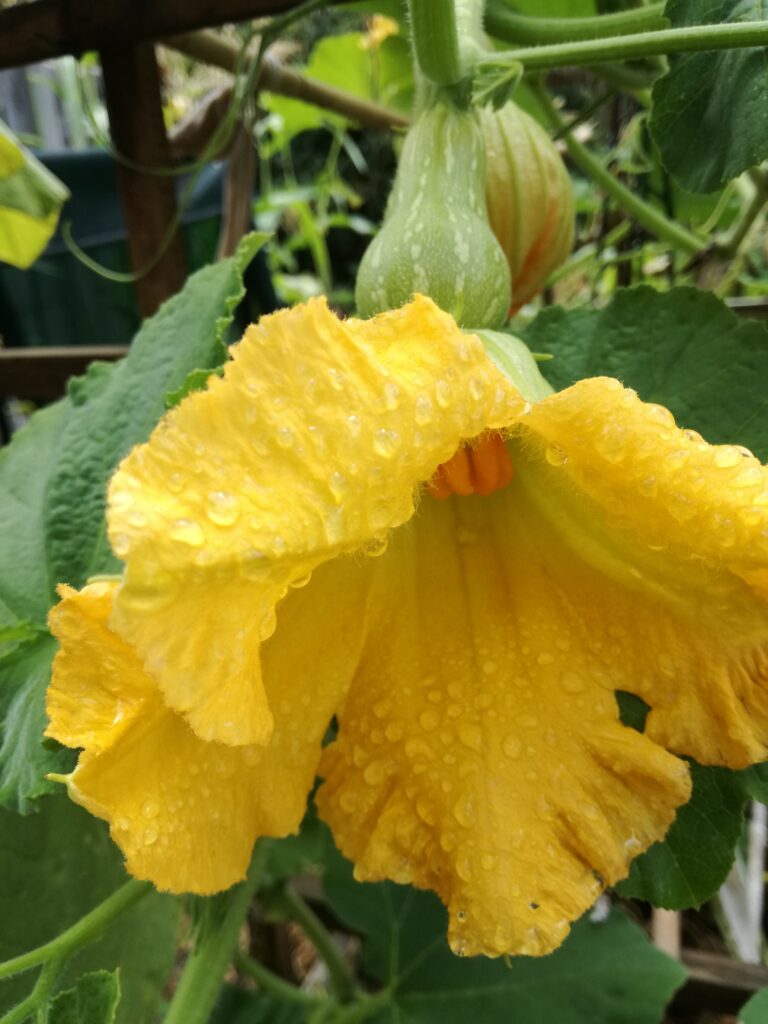
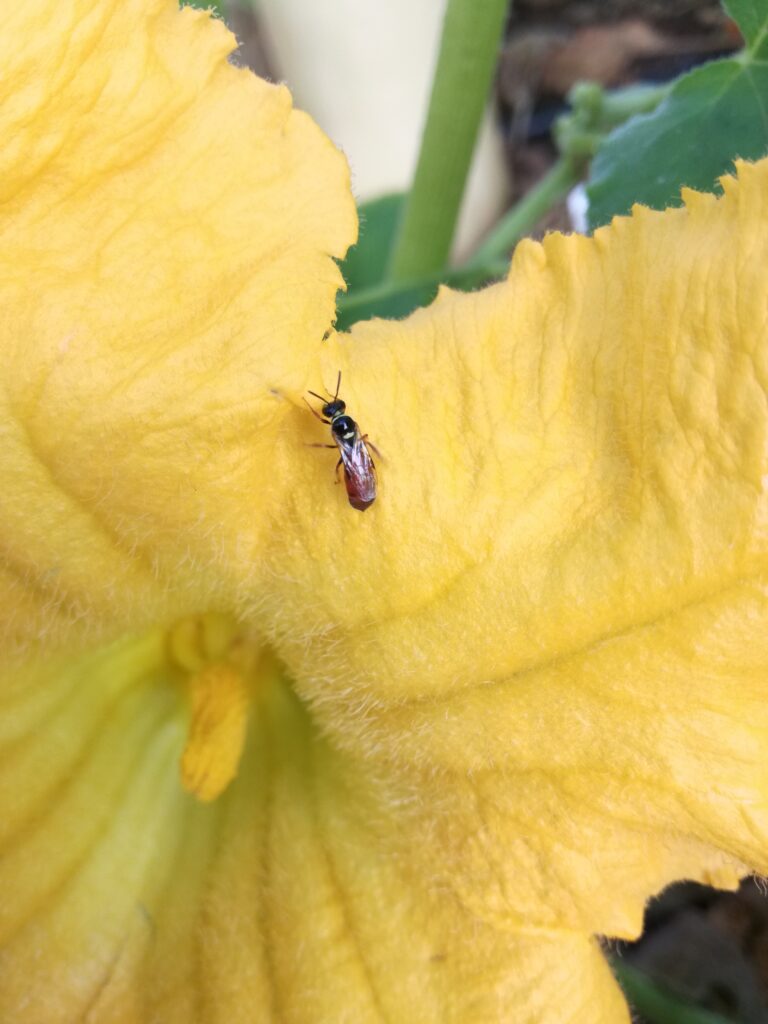
The flowers are pollinated by a number of insects including bees and wasps. If you notice that some of the little fruit fail to grow it may be because the female flowers are not being sufficiently pollinated.
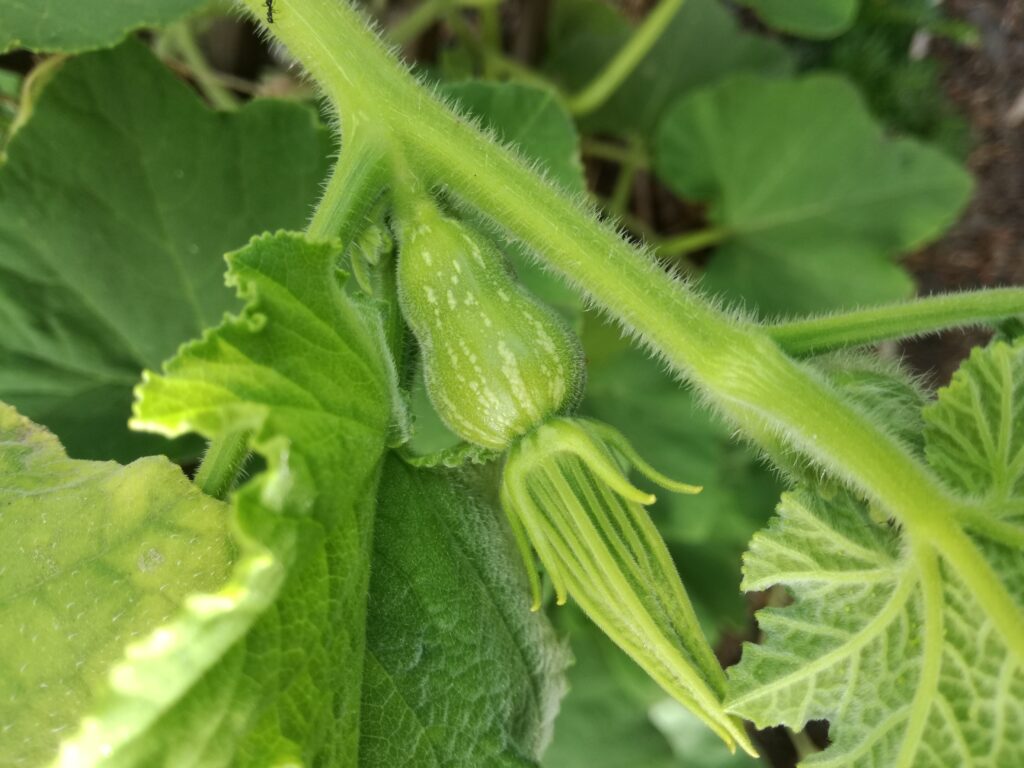
If this happens you may need to step in and become the pollinator. It is a fairly straight forward process which can help to save your crop. Using a small paint brush collect some pollen from the male flower’s pollen-covered anther (the male flowers are the ones with the plain, straight stems) and brush it onto the female flower’s stigma. Job done.
Pests and diseases
Blossom end rot
There are a few things to look out for when growing butternuts. If the young fruit starts turning yellow from the flower end the plant may be lacking calcium. Blossom end rot, as it is known, happens when there isn’t enough calcium to form healthy cells in the developing fruit. When I noticed this was happening to some of my butternut babies I did some research looking for organic quick fixes.
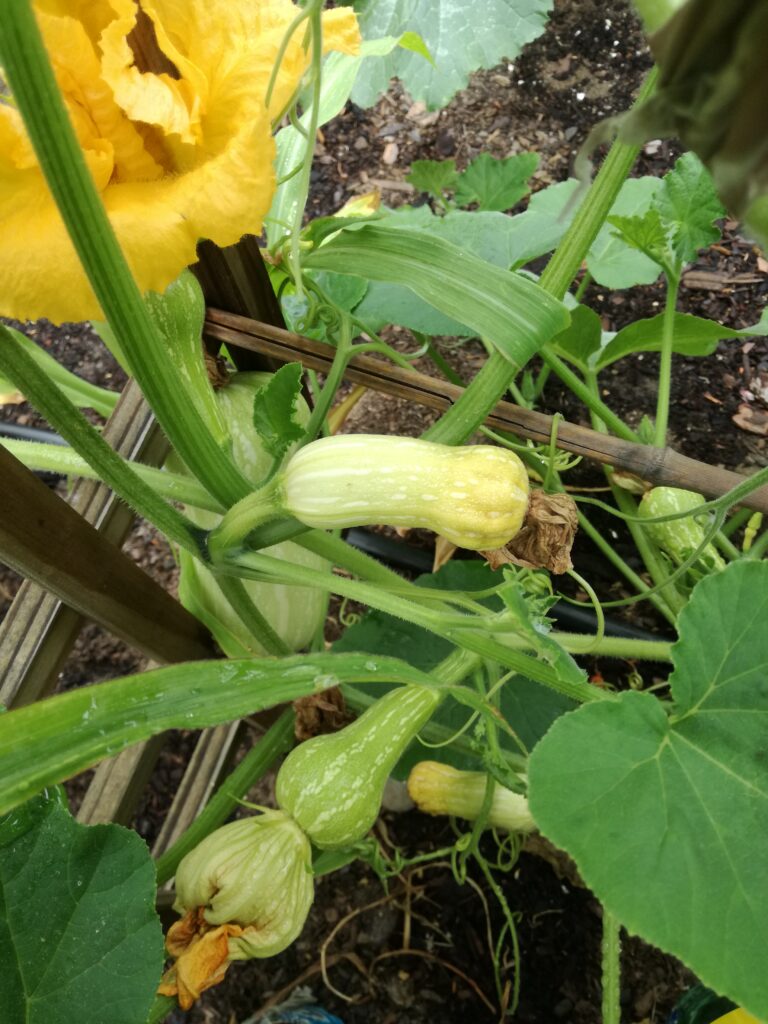
One recipe I found online was to brew a few litres of chamomile tea and to use it as a foliar feed. Chamomile is a very good source of calcium even for humans so it stands to reason that plants can benefit from it too. Another suggestion said to boil up about 20 egg shells in some water and leave the mixture overnight before spraying it on the plant’s leaves. Well, I tried both remedies and they worked. I used them a few days apart so cannot say which was the better option. These are also recommended as treatment on tomatoes which are also prone to blossom end rot.
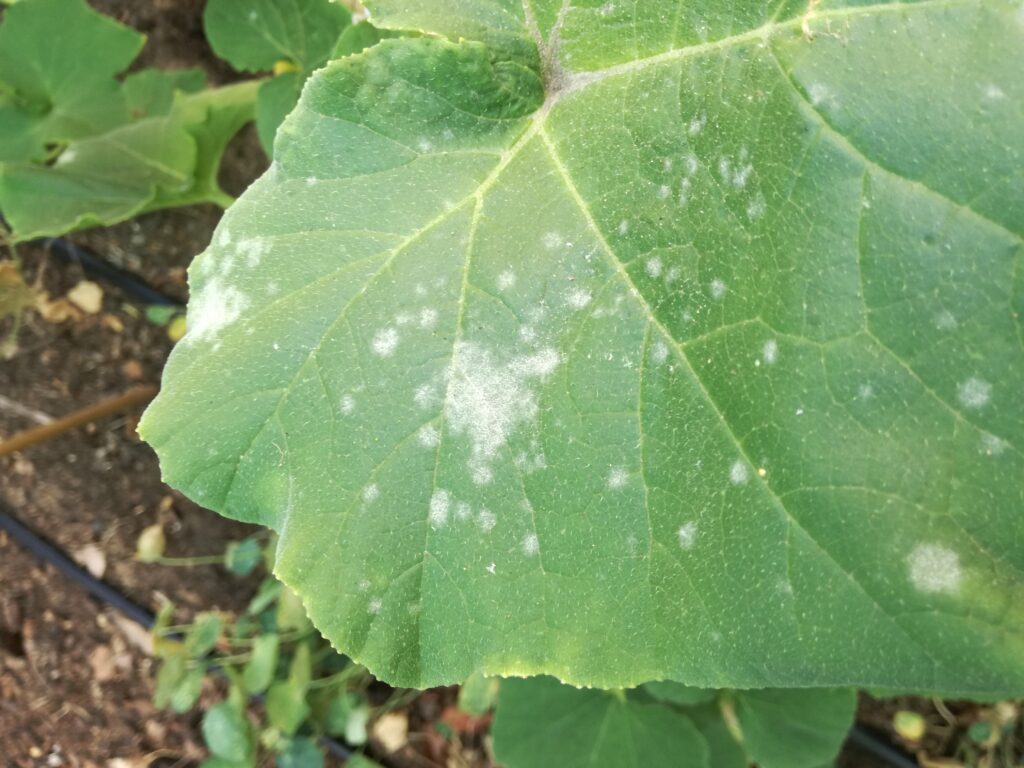
Powdery mildew
This is a fungal disease which is fairly easy to identify. Whitish grey powdery patches start forming on the leaves. In severe cases the leaves wither and die causing stress to the plants. Squash are prone to getting powdery mildew and although it is not usually fatal for the plant, it can lead to weakened plants and reduced yields.
There are a few organic remedies one can use to combat powdery mildew and a well documented option is to spray a milk and water solution onto the leaves. Bicarbonate of soda mixed with some water has also been suggested to rid your plants of this fungus.
Pumpkin fly
To me the biggest issue I have with my butternuts is protecting them against pumpkin fly. These insects are the bane of my life in the veggie garden at the moment. The adult females lay their eggs in the very young little butternuts and then their larvae cause tremendous damage by eating the fruit which causes it to rot.
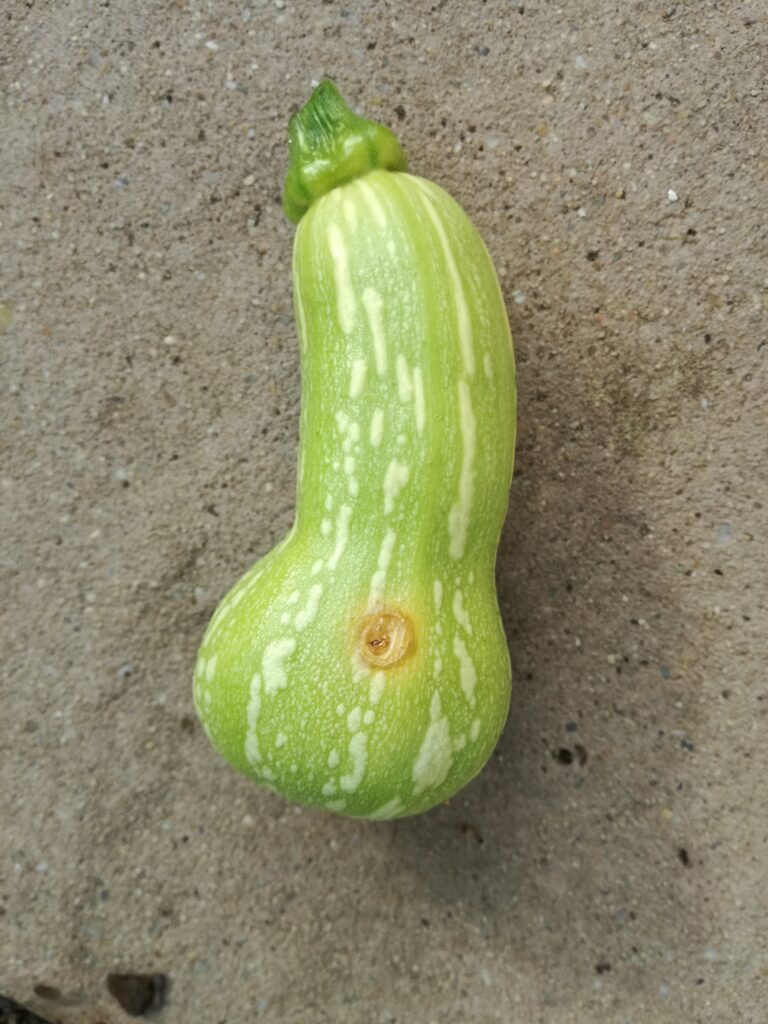
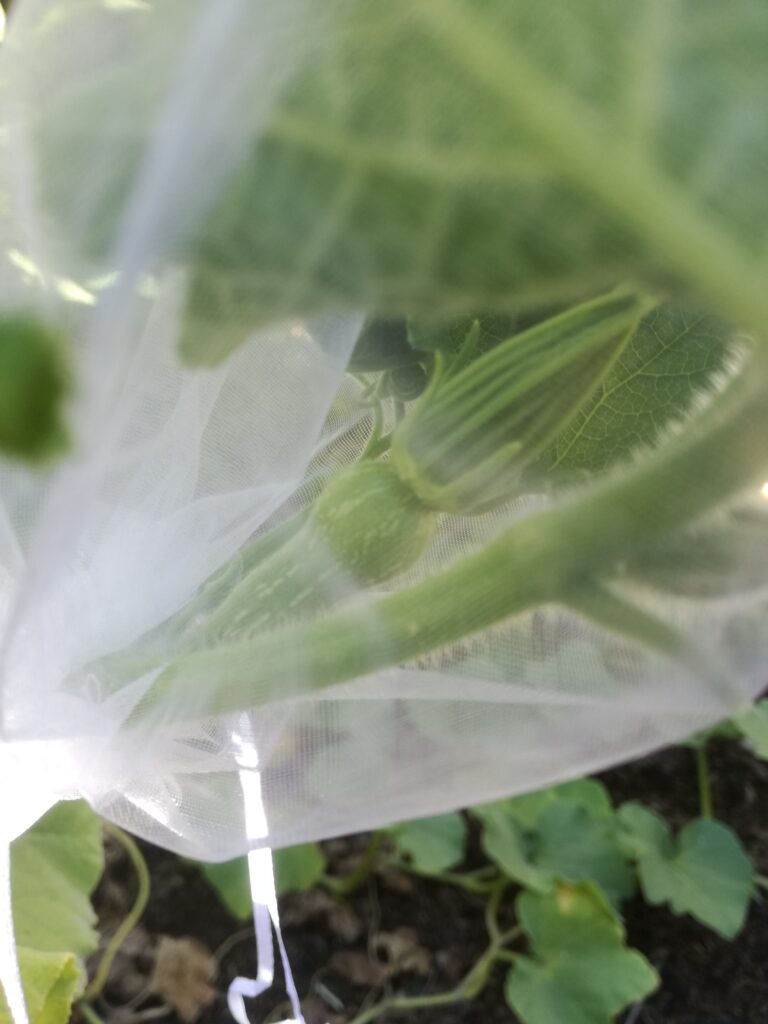
Baited traps and coating the tiny butternuts in neem oil have been helpful but I am still losing a large proportion of my crop. I decided to follow one gardener’s advice given on a social media gardening group. I have covered the young fruit in organza bags in the hope of keeping the little butternuts out of the reach of those pesky pumpkin flies.
This will mean that I am going to have to hand pollinate the flowers once they open but that is a small price to pay if it means saving my butternut babies.
When to harvest your butternut
There are a few tell tale signs to look out for to know when your butternut is ripe enough to harvest. After waiting patiently for about ninety days since planting the butternut seeds one can understandably be quite eager to start picking the crop.
The first sign that the fruit is ready is its colour. The butternuts change in colour from a bright green to a creamy green and eventually a golden yellow. The below image shows a butternut that has reached a good size already but is still immature because it is a pale green.
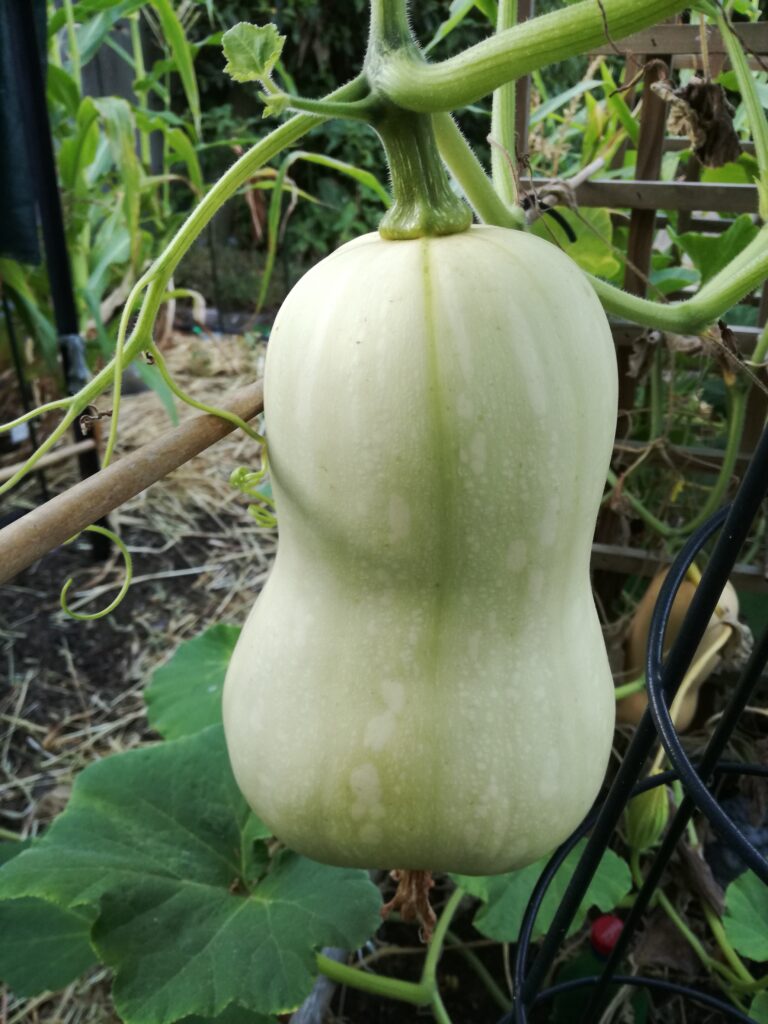
Once the butternut has turned a yellow golden colour it is important to check the stem connecting it to the vine. If it is still green, your butternut is still receiving nutrients and is not yet ready for picking.
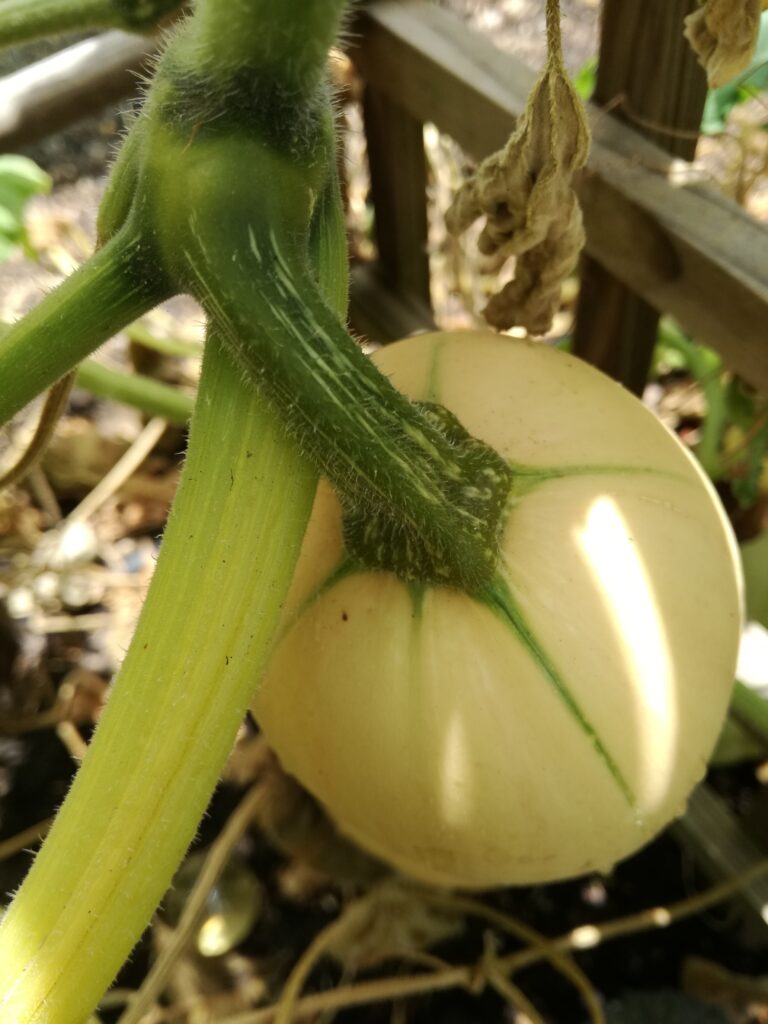
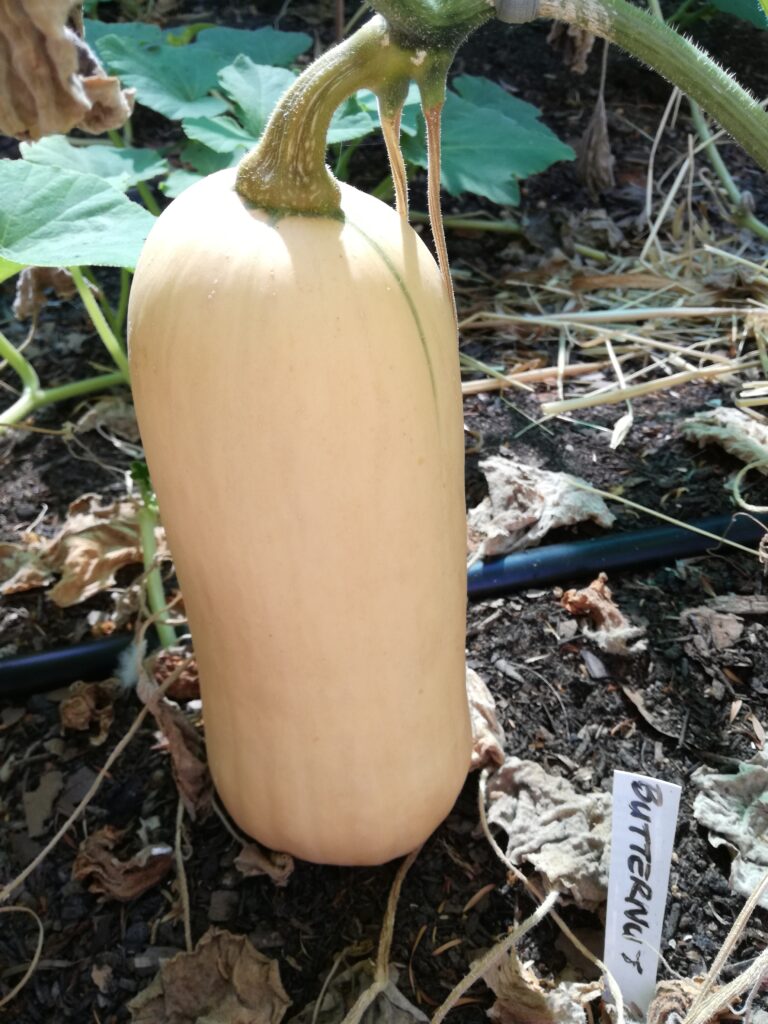
Your butternut is only ready to pick once the stem turns brown and starts to dry out. By this time the skin has toughened enough so that it can withstand some pressure from your fingernail. Cut the stem as close to the vine as possible so that you don’t damage the butternut.
Butternuts can be stored as is in a cool, dry place for a couple of months.
A very versatile veg
There are so many delicious dishes to make using butternuts. Roasted butternut and feta salad, butternut quiche or a favourite butternut soup to name just a few. I am making myself hungry now just thinking of these recipes. It is very rewarding growing veg oneself and I hope the insights I have given on how to grow butternuts will inspire you to give growing them a try.
Until next time, happy gardening.
Did you find this article interesting? If so, please share it with your friends.
2 thoughts on “How to grow Butternuts”
Very helpful thanks Nats! I think I am too late with stopping the wasps but will try and protect the rest of my crop using your tips.
I am having success using the organza bags over the little butternuts and hand pollinating the flowers. Good luck with your crop.
Comments are closed.